Showing posts with label Baking. Show all posts

Tuesday, May 12, 2020

{Breadmaker Recipe} Pumpkin Seed Honey Loaf


Weekend approaching, why not have some healthy breakfast?

Pumpkin seeds with honey bread loaf is one easy bake with the help of breadmaker this is super easy. You may replace the pumpkin seeds with any other nuts or seeds of your choice, maple nuts or sunflower seeds would be a good option too.


Preparation Time: 10 Minutes
Baking Time: 4 Hours
Serving size: 500gm loaf / 6-8 slices


Ingredients:

• 250g organic High Gluten flour
• 15g unsalted butter
• 2 tbsp brown sugar
• 1 tbsp milk powder
• 1 teaspoon salt
• 1 tbsp raw honey diluted in 180ml water at 5c°
• 1 teaspoon instant dry yeast
• 20g organic pumpkin seed 


The Making:

1. Mix all ingredient (except yeast and pumpkin seed) in the bread container as per display order, pour the honey water around the perimeter of the pan. Add yeast in the yeast dispenser and sunflower seed in the nut compartment.

2. Select "soft bread" function (or of equivalent on your machine, I used a Panasonic) and start. It shall takes 4 hours 20 min. 

That's it. I set mine to timer mode and enjoy a fresh loaf the next morning :) 

Love freshly baked bread too? Get your own Panasonic Breadmaker here...


Wednesday, January 22, 2020

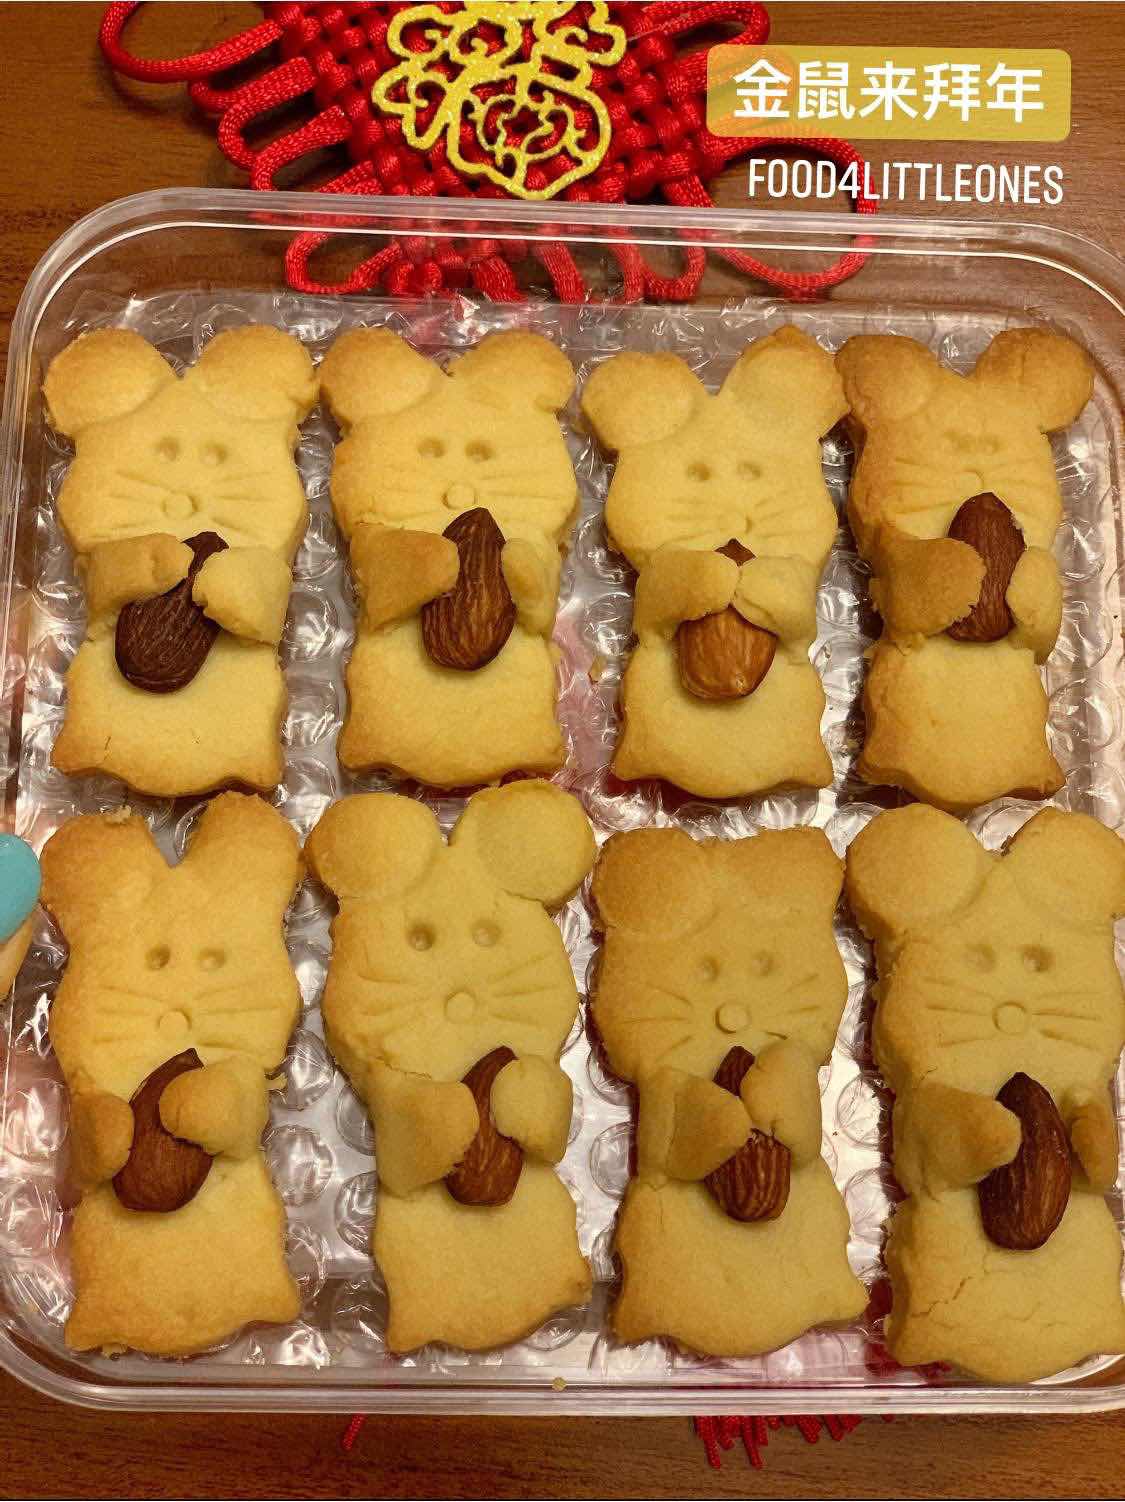
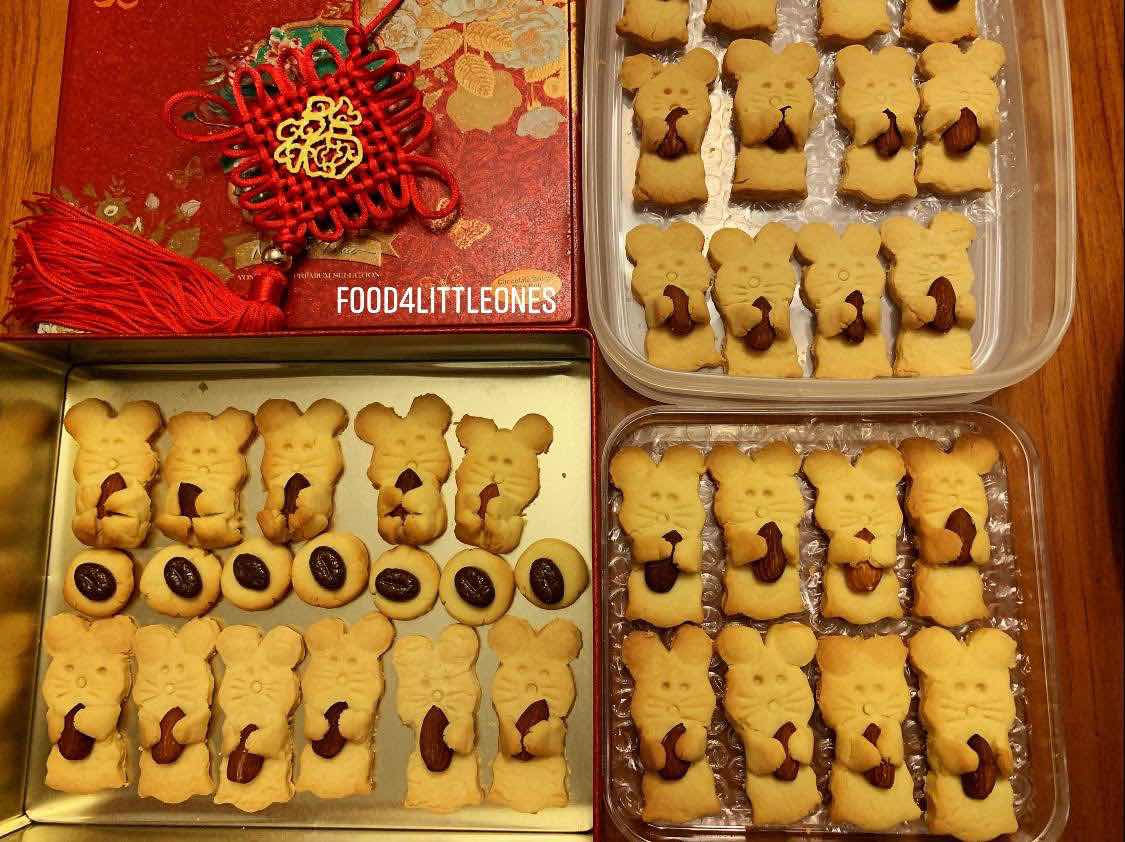
CNY Special: Little Mouse Butter Cookies 金鼠抱喜


It’s been a long long while since my last uploaded any recipe as the work and family life as taken up a big part of my time, commitment as a working mom/daughter/wife is just too daunting. Anyway, this is one worth keeping. It’s a tested recipe by other blogger (see original link below) but the design is original ;)


Little Mouse Butter Cookies 金鼠抱喜

The Ingredients: 
  • 90g unsalted butter at room temperature 
  • 40g icing sugar, sifted
  • 15g egg yolk (use medium egg)
  • 170g cake flour (super fine flour), sifted
  • A pinch of salt (I omitted this)
  • 30-40 roasted almonds or cashews
The Making:
  1. Preheat oven at 150°c, brush the baking tray with butter or spray with a layer of cooking oil, and place a piece of parchment paper over.
  2. Cream butter and icing sugar using K mixer on high speed until the mixture became pale and creamy, add the egg yolk.
  3. Add the flour bit by bit, the salt, and continue mixing until you get a well mixed, non-sticky dough.
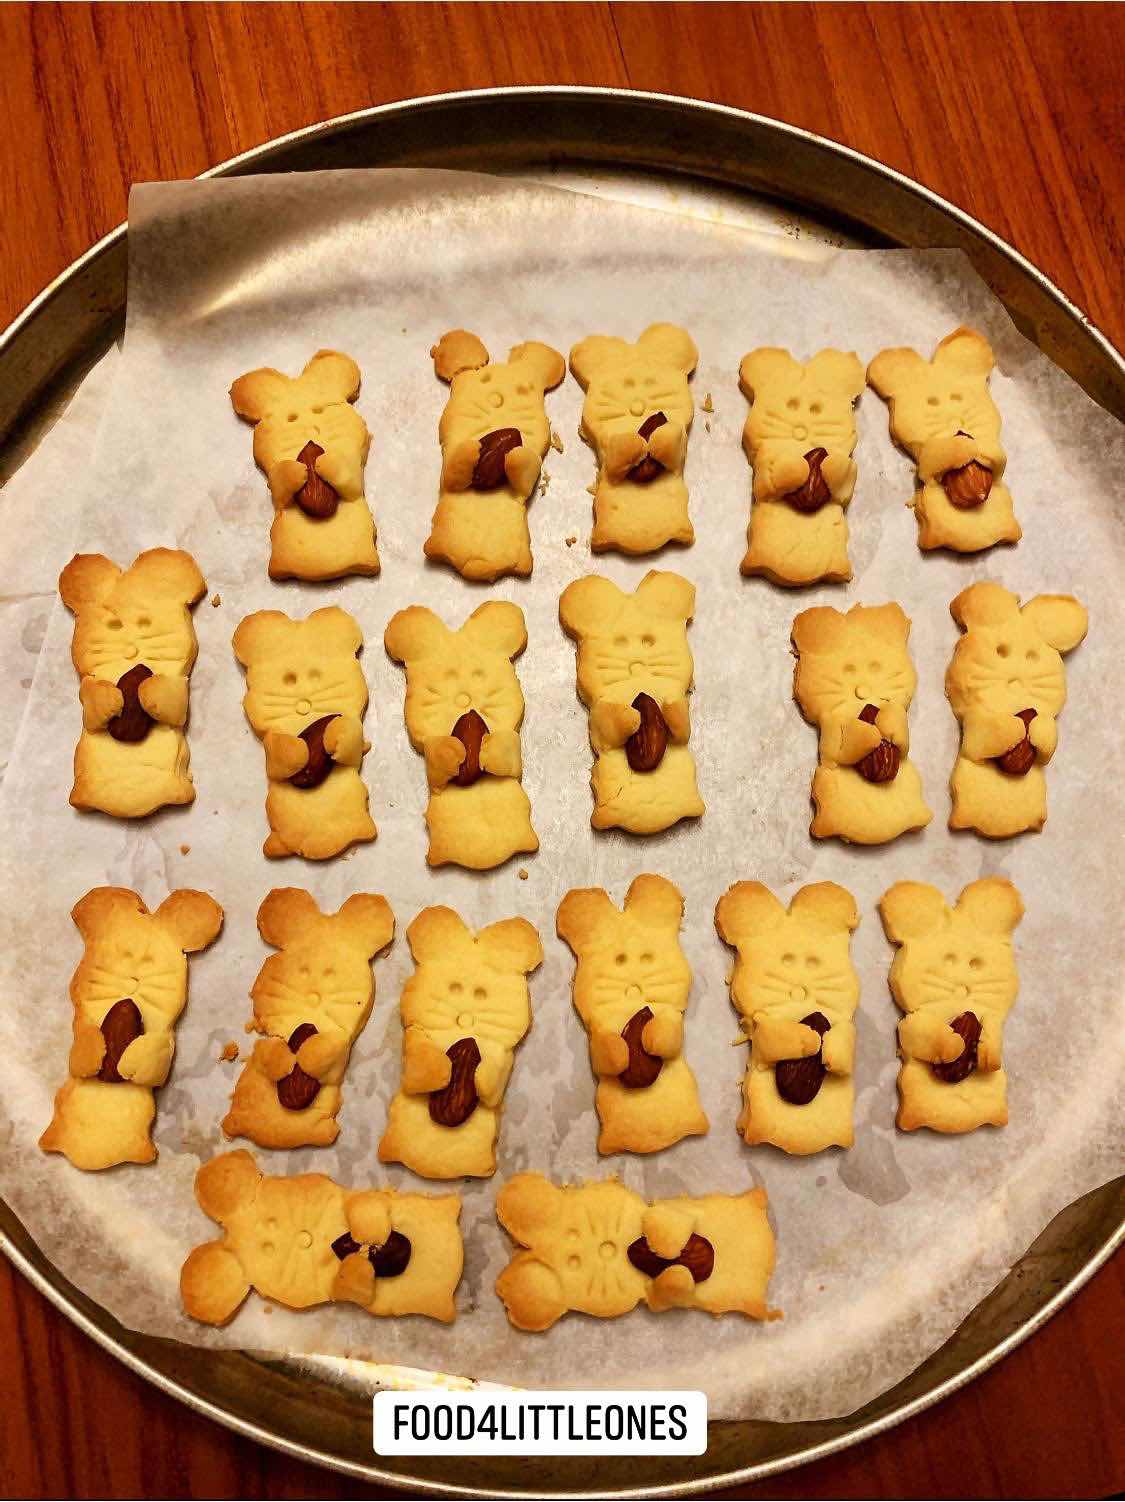
  4. To make the cookie into shape, I used a bear cookie cutter and modified the ear shape using my cake modeling tool (see picture). Make sure use both hands to hold onto the nut.
  5. Bake in middle tray for 10-12min, or until golden brown. Let cold before you store them in air tight container. 


Useful Tips: 
  • to avoid the cookies from cracking, make sure the cookie dough is thick enough - around 1cm. I made mine a bit too thin so quite a few had broken ears and necks *sob*
  • This recipe yield about 30 cookies. To make more just double the ingredients.

Happy baking & wishing you and your family a happy Chinese New Year filled with blessings and happiness.

Original recipe adapted from NasiLemak Lover, you may want to visit her website here :) http://nasilemaklover.blogspot.com/2016/01/nut-hugging-bear-cookies-2016-cny.html

Saturday, March 25, 2017

Grapefruit Chiffon Cake


The school holiday is coming to an end, I took Friday off and send the duo to Funtopia for some fun time (you may read more about the visit here - fun time @ funtopia), they totally zonked off after the session and sprung back alive after a long nap. Since we were at home and I was reluctant to go out again to face the congested KL traffic, I invited them to do simple baking with me and they joyfully agreed. 
  
Searched through my kitchen and managed to find just enough ingredients to make a chiffon cake. No pandan leaves, no oranges; well, grapefruit chiffon cake it is then!

The cake's smell was really inviting, a strong scent of grapefruit and tasted great too. If you are a fan of soft fluffy chiffon cake, I would invite you to give this recipe a try. ;-)

Original recipe adopted it from Christine's Recipes and i made some modifications to it.


E was happily helping and he was really amazed to see how the egg whites turned into the fluffy meringue. Time for science lesson (what caused the egg whites to triple in volume?) ;-)

Preparation time: 30 min
Baking time: 35-40 min
Serving size: 12 slices

Ingredients

Ingredients A - Cake Batter
• 100gm self-rising flour 
• 1 table spoon baking powder 
• a pinch of salt 
• 5 egg yolks (I used medium size eggs)
• 30 gm caster / brown sugar 
• 100 ml fresh grapefruit juice (from 1 large grapefruit as shown in pic)
• 80 ml cooking oil 
• 1 teaspoon grapefruit zest (about 1/4 of a grapefruit, make sure you wash the skin thoroughly before grating)

Ingredient B- for the Egg Whites  
• 5 egg whites 
• ⅓ table spoon cream of tartar 
• 60 gm caster / brown sugar

The Making:
  1. Preheat oven to 180°c. Prepare a 9" baking tray by coating it with a layer of oil or butter and brush evenly. E didn't brushed the oil evenly so part of the top were sticking to the tray >.<
  2. Sift the self-rising flour, baking powder and salt together into a clean mixing bowl, mix well using a spatula and set aside.
  3. In a separate mixing bowl, combine egg yolks, sugar, cooking oil, grapefruit juice and the zest. Mix well using the spatula, then gradually add the flour in step 1 and stir to mix well. You shall get a creamy batter now, just set it aside first.
  4. Now, change to a large clean mixing bowl (make sure it is clean from oil or water), beat the egg whites with an electric mixer for about 2 min until bubbles form. Add the cream of tartar and sugar gradually (about 1/3 at a time), and continue beating on high speed for another 2 minutes until stiff peaks form. (To know your egg white is ready, just turn the mixing bowl upside down and it shall holds the shape without even sliding. It's the best trick to wow the kiddos :)
  5. With a spatula, slowly fold the beaten egg whites into the batter. Do it really slowly as you don't want to introduce bubbles into the batter.
  6. Pour the mixture into the prepared baking tray  and bake in the preheated oven at 180°c for 15 mins. 
  7. Reduce heat to 160°c, continue to bake for 20-25 mins, or until cooked through (to test, just insert a cake tester into the middle of the cake and the needle shall come out clean. If it's sticky, just bake for another 3-5 min)
  8. Once the cake is removed from the oven, turn the baking tray upside down on a wire rack and let the it cool completely. This is important to help the cake rise to its full form.
You can enjoy the cake once it's cool. My kiddos finished half the cake in one afternoon tea session and they said it's better than any other chiffon cakes we've ever bought. :D 


Cheers,
PH

Monday, January 16, 2017

Super Moist (and easy!) Chocolate Cake


We celebrated E's 8 birthday recently, he invited his best buddies from school and requested to have a 2 tier cakes fearing his friends will get enough share of the cake.. lol, how thoughtful of him.

So after some considerations, I decided to combine his request with the letter 8, since it's his 8th birthday day, and here's the final design... A huge "8" moist chocolate cake consists of two 8" round cakes, filled with smooth chocolate ganache.


Added some printed flags.

Centerpiece for the birthday party..

It is rather easy to make, to my surprise. I have been using a different recipe all these while and I thought to try out a different recipe from BBC Food this time, and it was amazingly good! The cake taste even better after keeping overnight in the refrigerator.

See? Moist, fudgy and a consistent density.

Here's the making.

Preparation Time: 30 min
Baking time: 30-40 min
Waiting time: 60min
Assembly time: ~30min


Ingredients:
A) For the Cake
225g plain flour, sifted
300g caster sugar (reduced by 50g)
85g cocoa powder (I used Hersey cocoa)
1½ teaspoon baking powder
1½ teaspoon baking soda
2 medium eggs
250ml fresh milk
125ml vegetable oil
2 teaspoon vanilla extract
250ml boiling water

B) For the Chocolate Ganache 
200g chocolate solid / chocolate chips
200ml double cream / whipped cream

Original chocolate cake recipe adopted & modified from BBC good food.

** the above recipe is for a single 8" cake, if you need 2 cakes like me, just double the ingredients.


The Making:

Baking the cakes
1. Preheat oven to 180°c / 350°f. 

2. Line two 20cm / 8" round baking tins with baking parchment. Spray/spread a thin layer of cooking oil to avoid sticking.

* do note that the batter is very very diluted, so use a proper sandwich tin, or make sure you line carefully with the parchment paper to avoid leakage.

3. In a large mixer bowl, mix flour, sugar, cocoa powder, baking soda and baking powder evenly, then add the remaining of ingredient A (except the boiling water) into a large mixing bowl. Whisk till the mixture is smooth and well combined.

* I used electronic mixer and turned it on high speed for about 3-5 minutes for the batter to mix thoroughly.


4. Now slowly pour the boiling water into the mixture, a little at a time to ensure the ingredients are well combined and all smooth. 

* The batter is very, very diluted, almost like liquid. So don't panic.;-)

5. Divide the cake batter equally between the baking tins, then bake in the oven's middle tray for 30-40 minutes. If it is still liquid or sticky when tested, bake for another 5 min.

* to test, insert a cake tester into the middle of the cake (as that usually take the longest to bake thru). If the cake is ready, the tester should comes out clean, otherwise just bake for another 5 min and check again.

6. Remove cakes from the oven and allow to cool down completely on a rack while still in the tin.
 
Prepare the Chocolate 
7. While the cake is baking, you may prepare the chocolate ganache. Heat up fresh milk in the microwave oven for about 2 minutes. 

8. Toss the chocolate solid (chopped) or chocolate chips into the bowl of fresh milk. Stir constantly until the chocolate has melted completely and form a smooth texture.

9. Let cool then keep in refrigerator for about 1 hour. The chocolate ganache shall be thickened like peanut butter sauce.

Assemble the cakes
10. Carefully remove the cakes from the tins. Using a cake knife, carefully slice off the uneven top to achieve a flat top, then cut into half of equal height.

11. Spread a generous layer of chocolate ganache over the bottom layer cake, then top with the upper half of the other cake like a sandwich. 

Repeat step 10&11 if you have 2 cakes like me.

To assemble an "8" shape cake like shown above, you have to cut off about 1" from one side of each cakes, and connect them together to form the "8" figure.

• Tips: to ensure the cake stay still on the board, spread a little buttercream / chocolate ganache to the board before placing the cake on top.

12. Move the cake to a cake turner (or a serving plate), spread a generous layer of chocolate ganache then spread out evenly with a palette knife, then continue with the side.

• Tip:  I find it is much easier to spread the chocolate evenly by using a cake turner as I can rotate the cake slowly while I run the palate knife over the cake.

13. That's it, your moist, rich chocolate cake is done! Remember to refrigerate your cake until it's ready to be served..

Enjoy!

Cheers,
PH

Wednesday, September 16, 2015

Best Homemade Waffle Combo!


Waffles seem to be the latest attraction in town, there is this Owl Cafe, Madame Waffle, Kaffeine cafe all well known for their sweet and savoury waffles. I have managed to try out 2 of these waffle shops and decided to give it a try at home. 

1 batter. 3 different flavors. 1 big breakfast. 2 superbly happy kiddos.

This is my Green Tea, Cocoa & Tuna Waffles Combo, with a drop of vanilla ice cream. 

Ahhhh.... Life is good.

Best companion: Tuna waffles with mayonnaise, Cocoa waffles with cocoa syrup, Green tea waffle with almond flakes and fruits & nuts.  


Tuna Waffles

Green Tea Waffles

Chocolate Waffle with Vanilla Ice cream

I thought I made too many waffles (total 12 pieces) but we managed to finish all! The tuna waffle is voted the best by Big Guy and my little boy. Perhaps next time I shall try some bacon bits.. :)

Just use the batter recipe I shared last year here, and mix in different bowls. 

• Green tea: mix 7gm or 2 teaspoons green tea with 6 tablespoons of batter.

• Tuna: mix 4-5 tablespoon of tuna flakes in water with 6 tablespoons of batter.

• Cocoa waffle: mix 2 tablespoon of unsweetened cocoa powder with 6 tablespoons of batter.

I love homemade breakie as we can add any condiments as we like. Almond flakes, sunflower seeds, cocoa syrups, raisins, dried cranberries, berries, blueberry jam, apricot jam... The combination is simply endless!

Hope you enjoy this as much as we do. Ciao!

Monday, September 7, 2015

Double Chocolate Cookie Balls


The kids absolutely love chocolate, and so do I. I have been buying them Chipsmore cookies occasionally but when I'm not too lazy, I will bake our favorite double chocolate cookies with reduced sugar. Today happened to be my not-so-lazy day so I started baking while listening to my all time favorite album, French Kiss. 
  

Soft on the inside, crunchy on the outside. It's what I called Love at first bite...


Preparation: 30 minutes
Baking Time: 10-12 minutes
Serving: 14-16 pieces

Original recipe adopted and modified from Food Lovers' Cooking for Children.


Ingredients:
• 100g unsalted butter, cut cubes
• 100g brown sugar 
• 3 tablespoon unsweetened cocoa powder (I used Hershey's)
• 1 teaspoon baking powder
• 1 teaspoon vanilla extract
• 1 large egg, beaten
• 170g all purpose flour, sifted
• 2 palmful / half cup of dark chocolate chips (add more if you wish)
• 1 teaspoon icing sugar (for sprinkle)


The Making:

1. Preheat oven to 180°c, lay a piece of baking sheet over the tray.

2. In a dry mixer bowl, beat butter with sugar until fluffy, then gradually add in the egg, vanilla extract, the sift in the flour, baking powder and cocoa powder.

3. Mix with a spatula until well mixed, then add the chocolate chips.

4. Using your palms, shape one large scope of dough into a round ball and place the cookie dough onto the baking tray, with at least 2" apart from each other.

5. Bake for 10-12min in the middle compartment, the cookies will expand slightly when baking.

6. Once done, remove from oven and let cool for about 10 minutes. Sprinkle with some icing sugar on top and keep in an airtight container. I could never resist to eat one right away, they smell too good to resist!

Enjoy...  ;)


Saturday, August 15, 2015

Kids Friendly Beef & Mushroom Pie


I have a sudden craving for pie, hot piping meat pie like the ones we had in London, paired with a pint of cold ale. Perhaps it's the raining weather, or just the desire to travel.

So I searched for some best pie recipes and decided to stick with Jamie Oliver's  Aussie Humble Pie, I used to watch his cooking show in late night and he's still one of my favorite hosts. 

I made some minor adjustments to the recipe to make it kids friendly -- replacing  ale with non-alcohol malt drink and added some green peas which the kids like. 

The duo absolutely love these pies, they ate 2 slices each and finished everything on the plate, including mushrooms which they usually picked and chucked aside. So I must say this recipe is a keeper!


Hot Beef & Mushroom pie....


The thick gravy is just oh-so-nice!


Ready to bake (before applying egg wash..)

Ta-da.... The pies are served.

I made 2 medium size pies with this recipe, or you may use a larger pan too. It's more than sufficient for 4 persons sharing.

Preparation Time: 45min
Waiting Time: 2-3h
Cooking & Baking Time: 2h
  
The Ingredients:

For the filling:
• 500gm beef, cut into chunks (Jamie's recipe uses 1kg)
• approx 2 dash of ground pepper
• approx 6 dash of nutmeg powder
• 8 fresh brown mushrooms, sliced 
• 2 whole carrots, cut into small chunks
• 2 palmful of frozen green peas
• 2 clove garlic, diced 
• 2 shallots, diced
• 2 sprigs rosemary (add more dried rosemary if you wish) 
• 250ml Malta drink (replacement for pale ale)
• 1 tablespoon tomato purée 
• 1 tablespoon plain flour


For the dough:
• 600gm plain flour
• 150gm unsalted butter, cut cubes 
• 150gm shredded cheddar cheese (I reduced to 100gm)
• 1L cold water
• 1 egg yolk, beaten
• spray cooking oil / extra butter for brushing 

The Making:

Little E snapped a shot of mommy preparing the pie base.

1.  Heat up 2 table spoons of olive oil, sautée the onion, garlic, and follow by carrots. Add salt and rosemary, cook for about 10 minutes then set aside. 

2. Season the beef with salt, nutmeg powder, pepper and 2 tablespoon of olive oil, mix well. Heat up a pot and cook the beef on high heat until turns brown.

3. Pour malt (or ale if you prefer the authentic taste) into the pot, follow by flour and tomato purée. Add 1L of water and let the liquid boils. Stir occasionally to ensure nothing sticks to the bottom of the pot.

4. Add the sliced mushrooms, cooked vegetables and green peas. Then close the lid and let it simmers on medium heat for about 1.5 hours or until the gravy is thicken. Let the stew beef cold down completely before using (I transferred it to a pot and keep it in the fridge) 


Preparing the dough - you can make this a day earlier and store it in the freezer compartment (covered in cling film)

5. In a clean mixer bowl, add shredded cheese into the flour, follow by butter cubes. Rub to mix with your hands then gradually add in water. Continue mixing until you get a smooth dough. Cut half, half to be used for dough base and the other for the pie top. 

6. Using a rolling pin, spread out the dough on a clean surface to form a large square, then lay over the baking pan (coat with a layer of cooking oil or melted butter to avoid sticking). Cut off the excess edges (refer to picture above), then wrap the dough base with cling film and let it sits in the fridge for 2-3 hours or overnight.

Wrap the excess dough in a cling film to be used for pie top later.

7. Pour the stewed beef into the hardened dough base until full. Spread out the remaining dough with a rolling pin then cover the top completely. Cut off the excess dough at the edges and press the edges with a fork to form a neat lines pattern. Cut 2 or more small holes on the center top of the dough with a knife.


8. Preheat oven to 180°c. Brush the pie top with some egg yolk and bake for 15-20 minutes until it turns golden brown. 

Your kitchen will be filled with nice aroma of the pie once you open the oven door. Let it cool down then dig in and enjoy your piping hot pie... It's really mouth watering and my duo were actually fighting for more. :)


Need More?
You may want to hop over to Jamie's food tube and check out his video guide (click here to watch). This aussie beef pie is so delicious that it's worth the time to prepare it.


Friday, August 7, 2015

Mini Mooncakes for the Little Ones


Little ones loved the piglet mooncakes I bought for them last week, these are the traditional mooncakes that I used to eat when I was little. They certainly bring back beautiful childhood memory, those days when my neighbor kids and I carried our handmade paper lanterns and paraded the street. Nowadays they have battery powered lanterns making funny music. Ewk.

Anyway. I happened to drive pass a bakery supplies store one morning and I decided to take a peek inside the store.. and I saw there are tons of mooncake ingredients and supplies...

I.just.could.not.resist.the.temptation.

We made these mini mooncakes.

With red bean paste filling.

The ingredients. 
 
I got the duo to assist in making the mini mooncakes. They were so excited to "help up" as usual.

The making was simple, as we used premixed red bean paste for filling. You may substitute with lotus paste or mungbean paste too. Since mooncake festival is coming soon, this is one sweet delicacy that can really wow your guests during the festive season. 


Original recipe is adopted from Christine's Kitchen, you may want to refer to her recipe for traditional mooncakes (it's written in Chinese). She even shared the steps to making your own golden syrup and mooncake fillings so you really ought to visit her site if you are leaving abroad. She is one of the few bloggers who inspired me to bake and cook as she made everything look so easy.


Preparation time: 60 minutes
Banking time: 12 minutes
Serving size: 12 mini mooncakes


Ingredients:
A) For the mooncake skin
• 100gm plain flour
• 60gm golden syrup 
• 28gm pure peanut oil
• 1/2 teaspoon alkaline water

B) For the paste
• 300gm red bean / lotus paste (original recipe used 420gm)

C) For egg wash
• 1 egg yolk
• 2 tablespoon egg white

Steps:
1) Mix
Mix all ingredient A in a mixer / bowl and roll them into a smooth dough using a spatula. Set aside for 40 minutes and covers with a cling form. There's no need for an electric mixer. 

2) Shape
Shape the mooncake mixtures into equal ball of 15gm each, and the lotus / red bean paste to 25gm each (Christine made hers at 35gm). Flatten the mooncake mixture with a rolling pin then then wrap it around the paste. Roll into small balls with your palms. Little ones can handle this step very well.

3) Mold
Using the mooncake mold, press each mooncake firmly but not super strength as you won't want them to crack... My boy sure learnt the hard way as he had to redo a few times before he managed to have smiling Mickey without cracks.


4) Admire
Yeah, just take a moment to admire your hard work.. Ours are kind of uneven, that's the price to pay when letting little ones be involved.

5) Bake
Preheat oven to 180°c, place the mooncakes onto a baking tray (with a layer of baking sheet or sprinkles with some flour to avoid sticking), bake them for 10 minutes; remove from oven, apply the egg wash (ingredient C) with a soft brush, then continue baking for another 2-3 minutes until golden brown. 

6) Wait
The mooncakes are done! However, you should let the mooncakes rest for 2-3 days before eating and you will notice the surface turns to a smooth golden layer.

Or you may be like us, just eat them right away.. LOL. I told you my little ones and I love traditional mooncakes, didn't I? 


Enjoy... Next I may challenge some cute piglet mooncakes. That looks too cute to resist.

All 6 steps in one picture collage for your easy reference. Feel free to share the picture of your mooncakes! ;)

Tuesday, July 28, 2015

Steam Chocolate Cupcakes 蒸可可小蛋糕


The kiddos often complain hungry in the afternoon, lack of any snack to offer today, I decided to make some cuppies to fill up their ever-grumbling tummies.

They gracefully offered to help up (more like mess up) and it only took about 40 minutes before we sat down to enjoy our delicious homemade treats.

The steam cuppies were fluffy and soft, Little E liked it so much that he munched up 3 cuppies before I managed to stop him from sneaking another one...
 

Cuppies, anyone?

So fluffy...

Preparation Time: 25 Minutes
Steaming Time: 18-20 min
Serving size: 12 medium cupcakes 

Ingredients:

• 120g all purpose flour 120克普通面粉
• 20g unsweetened Cocoa powder 20克无糖可可粉 (I used Hershey's cocoa)
• 1 tbsp baking powder 1茶匙发粉
• 180g unsalted butter 180克无盐牛油 (cut into cubes 切小方块)
• 70g granulated or brown sugar 70克幼糖 (我用粗黄糖)
• 3 medium eggs 蛋三颗

 
The Method:
1. Using a mixer, blend butter cubes and sugar on high speed until well mixed. Add the eggs one at a time. 

把牛油和糖混合,快速搅拌均匀后,逐粒加入鸡蛋。

2. Sieve flour, cocoa powder and baking powder into a clean bowl, then add into the butter mixture, mix well on medium speed until you get a creamy texture.
把面粉,可可粉和发粉筛过,加入牛油混合物中,用中速把面粉搅均。

3. Scoop equal amount of dough into the cupcake holders - until about 3/4 full.
把搅拌后的面团倒入小杯子里,约七分满即可。

4. Place the cupcake holders over a steamer with lid closed, steam on high heat for 18-20 minutes.
放入蒸炉,关盖大火蒸约十八至二十分钟即可。

5. Once done, remove from stove and let cold before eating. You may keep them in an air tight container for later consumption, the cuppies were still soft and fluffy when we had them for tea time the next day.

冷却后可立刻享用,也可以装入密封罐,第二天还是松软可口的哦!

Saturday, March 21, 2015

{Breadmaker} Super Easy Banana Cake


I had some left over banana that were overripped, none of us was interest with it anymore. Instead of chucking them into the dustbin, I recalled my breadmaker can make cakes too, so why not give it a try with banana cake?

It turned out fabulous. I added some almond nibs and they gave an extra nutty aroma to every bite. 


My machine made a real small cake, just double the ingredient if yours is of a larger capacity (this is 500gm).


Simply soft and aromatic, love the texture.


Preparation Time: 10 Minutes
Baking Time: 1 Hours 30 min
Serving size: 500gm loaf / 6 slices

Ingredients:

• 100g unsalted butter cut into small cubes
• 80gm granulated / brown sugar
• 2 tbsp /30ml fresh milk 
• 2 medium / 100gm egg, evenly mixed
• 50gm / 1 medium banana, cut into small chunks of 1" each
• 180g super fine flour (can be replaced with equal amount of self rising flour if you are without baking powder)
• 7gm baking powder 
• 30g almond nibs 


The Method:


1. add all ingredient into bread pan according to listed order.

2. Select menu "12" (for Panasonic BM) or Cake recipe on your bread maker. Press "start".

3. When you heard the beep sound (12  minutes later), open the lid (DO NOT PRESS STOP!) and use a spatula to scrap off any excess flour on the sides. Then closes the lid and press "Start" to continue baking.

The cake shall take another 1h15m to complete. Let it cold on a rack for about 10-20min before eating.

Isn't it easy peasy? Breakfast is a breeze now with the help of my bread maker. What I like most is that washing is minimal and it's so easy that even my boy can handle with ease.


Some Useful Tips, Just so you know...
• A friend once complained to me it's taking her a long time to measure all ingredients one by one. Not a problem if you take the shortcut like me.

I place my bread pan over the electronic scale and pour all ingredient directly into it without using any extra container. You can reset it to 0 each time before adding next ingredient, or just keep summing up the weight yourself, whichever you prefer. This way, I get precise measurement and very little utensils to wash.

• I precut all my butter into cubes and store them in an airtight container in the fridge. Each time I need the butter for bread/cake baking just drop a few cubes, each cube is approximate 10gm if you cut your butter block into 20-22 equal size.