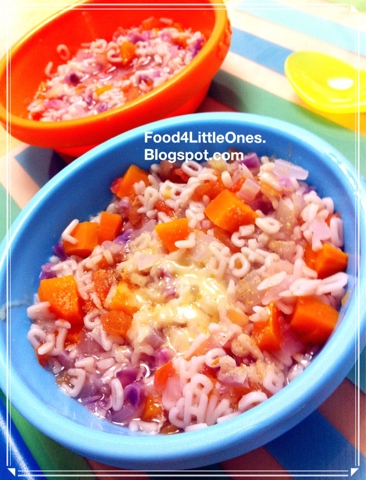
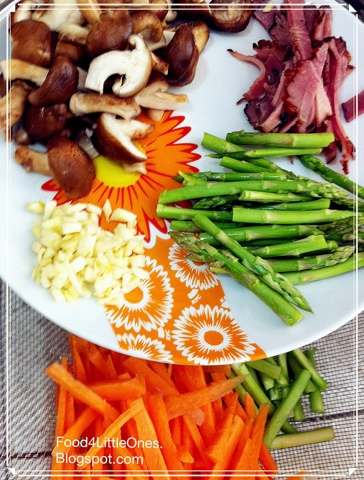
Showing posts with label Vegetarian. Show all posts

Saturday, July 5, 2014

Easy Healtilicious Pumpkin Soup

This is one nutritious recipe suitable for young and old ones. Smooth, flavorful and full of goodness. Pumpkin soup is one of my little ones' favorite soup whenever we patronage western restaurant, but it really is quite easy to make at home kitchen. I have ran out of milk at home otherwise the texture will be even creamier. 

This soup is ideal for infant too, with just pumpkin, garlic and onion, it's one nutritious early food for your little ones. Just skip the cinnamon, salt and fresh milk.


Preparation Time: 10 min 
Cooking Time: 30 min
Serving for: 4-5 person

Ingredients:
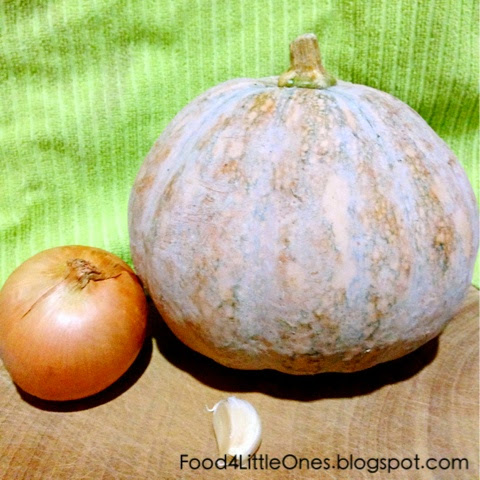
1 medium pumpkin, cut into cubes and wash
1 whole onion, finely chopped 
1 garlic clove, finely chopped
900ml / 6 rice bowls of water or stock
300ml fresh milk (or replace with water / stock)
A dash of cinnamon 
A dash of salt to taste
2-3 slices of bread 


Essentially, these are what you need to make this soup.

The Making:
1. Heat a table spoon of olive oil in a pot, add in the chopped garlic and onion, stir fry for about a minutes until the onion turns translucent. Add in the pumpkin cubes and cook with lid on for about 3 minutes. 

2. Add in the water or stock, let it simmers on high heat for 5 minutes then switch to low heat. Cook for approximately 25 minutes or until the pumpkin cubes turn mushy. 

3. Add in the milk and let it simmer for another 5 minutes. Unfortunately I've ran out of milk so I used only water.

4. Turn off the heat. Using a hand blender, blend the soup directly in the pot for about 2 minutes on high speed, until no lumps observe.


Prepare the croutons:

5. Using a separate pan, melt a small lump of butter and pan fry the bread on both sides until it turns golden brown and with crunchy edges. Cut into cubes or long strips and drop into the pumpkin soup when serving.


Yums..... Hot and aromatic pumpkin soups to warm the tummy on a rainy night! Now I'm going to keep a small pot for my old ma who has been ill, this shall do her good.


Just for Sharing..
Pumpkin is high in fiber and a good source of beta-carotene, anti-oxidant, vitamin A and is low in calories. It also has high level of potassium which is needed to keep our muscles and heart working at optimum level. So, if you are not a pumpkin lover, perhaps you may re-consider this pumpkin soup in view of it's many benefits.. ;)


Monday, April 14, 2014

Green Tea Milk Pudding, Perfect Dessert! #15MinuteSuppers 绿茶鲜奶布 丁,最佳甜品

Bi-lingual | 双语版


I love everything green tea, green tea cake, green tea muffin, green tea cookies, green tea Popsicle... And when I had the silky smooth green tea pudding served with brown sugar syrup in a Japanese fine dining restaurant, Hanare in Intermark recently, I felt in love with it instantly and was determined to give it a try at home.

So here you go, the tried and tested version. I have modified the recipe to include fresh milk, replaced heavy cream with condensed milk and reduced the sweetness to suit the little ones. Hope your kiddo like it as much as mine.

I served the pudding in my Chinese porcelain tea cups, paired with the silverware dessert spoons that I got from Bangkok many years back. Aren't they perfect match? :)


This is mine... It's not for sharing.


Preparation time: 5 Minutes
Cooking time: 10 Minutes
Serving for: 4-5 cup

Ingredients:
3 table spoons / 4g Green tea powder
50ml warm water
350ml fresh milk
50ml condensed milk 
5mg Gelatin powder
5g Brown sugar syrup (adjust as per wish, I skipped)


The Making:

1. Dilute the green tea powder with the warm water and stir to dissolve. Heat up the fresh milk and condensed milk in a small pot, then add the green tea mixture.

2. Constantly stir the mixture with a spatula so it doesn't become lumpy. When the liquid starts to bubble, add the gelatin powder.

3. Turn off the heat, using a strainer, pour the liquid into the container. 

4. Let the pudding chill in the fridge for at least 30 minutes to harden. To serve, pour some brown sugar syrup or wild honey and top with some fresh berries of your choice, you are ready to enjoy!

We had ours without any syrup and it tasted just nice, the duo happily finished up their dessert and my little boy even gave me a thumb up. 

I'm looking forward to make more next weekend... :)


Just a note..
If you don't like the milky taste, just reduce the amount of fresh milk and replace with water.


我爱绿茶。绿茶蛋糕,绿茶松糕,绿茶饼干,绿茶冰棒等等... 全都是我的最爱。当我在城里一家日本餐厅尝到那丝般顺滑的绿茶布丁,还配着香浓的红糖糖浆,实在好吃得不得了,我就决定一定要尝试来个自制版。

经过几次的尝试和修改后,我的鲜奶绿茶布丁食谱诞生啦!为了小瓜们着想,我用鲜奶代替清水,少量的炼乳代替奶油,并减低糖的用量,不会太甜但依然美味,希望你家小瓜也喜欢! 

我用了中国瓷器茶杯和曼谷带回来的小银匙搭配,是不是绝配? :)


准备时间:5分钟 
烹饪时间:10分钟 
食量:大约4-5杯 

主料: 
3汤匙/4克绿茶粉 
50毫升温水 
350毫升鲜牛奶 
50毫升炼乳 
5毫克明胶粉末 
5克红糖糖浆(根据你的喜好调整,我越过)

做法:
1,绿茶粉加入温水中,搅拌溶解。用一个小锅煮温鲜牛奶和炼乳,加入绿茶混合液搅拌。 
2,不断用勺搅拌鲜奶混合物以免凝成块状。当你看到开始冒泡,把明胶粉末加入,继续搅拌。 
3,息火,使用一个过滤器把液体倒入容器中 (我用了瓷器茶杯)。 
4,把布丁放入冰箱冷藏至少30分钟好让它硬化。

食用前,倒些红糖糖浆或野生蜂蜜,再铺上新鲜的草莓,自制绿茶鲜奶布丁完成啦! 

温馨提醒:
  • 我没有用任何糖浆,就这么即食,味道刚刚好。我的小哥哥还给了我竖起一根大拇指呢 
  • 如果你不喜欢太重的牛奶味,可以减少鲜牛奶的使用量,以同等分量的清水代替即可。

Sunday, July 7, 2013

Stir Fried Spaghetti with Dory Fillet

My little boy loves noodles and pasta, especially fried noodles. So i thought of cooking some stir fried pasta today since I only have less than 30 minutes to spare in the kitchen. In between cooking, I had to run out kitchen a few times to attend to the duo as they were asking to play bubbles, I am lucky that our kitchen oversees the backyard and the living hall, so I can keep an eye on them while cooking. Being a mom really requires a lot of multitasking, I feel like an octopus sometimes and I'm sure most moms feel the same! 

Here's the simple yet healthy family lunch.


The portion for my 19mo.. I cut everything into bite size. 


This is the first time I'm serving stir fried spaghetti to my sweetie pie, she seem to really enjoy her lunch, fed herself the entire plate of pasta without complaining. Proud of my little baby.. :) 

Saturday, July 6, 2013

Double Boiled Pear with Rock Sugar 炖冰糖雪梨

This is one of the traditional Chinese dessert that we often drink during hot weather, it's known to nourish the body and ease long chesty cough. You may serve it hot or chilled, either way I can assure that your little one will enjoy sipping the drink or eating the soft sweet pear. :)

I boiled this today after studying a few recipes, I decided to go with the traditional method of double boiled so the nutrition will be locked in the drink.


Preparation Time: 5 minutes
Serving for: 3-4 small bowls

Ingredients:
1 Pear 雪梨一粒
1 rock sugar 冰糖适量 (adjust according to liking)
3 rice bowl of warm water 温水三碗
8-10 apricot kernel  (optional) 南北杏8-10颗 (可免)


The making:
1. Fill a pot with water to about half the height of the double boiler, boil on stove. The pot itself shall be taller than the double boiler in order to fit.

2. Clean, peel the pear, remove the core and cut into wedges, put the pear and apricot kernels into the boiler except the rock sugar.

3. Add enough warm water to cover the pear (I used 3 rice bowl of warm water), close the lid and boil for 1.5 hours (or you may shorten to 75min). First 10 minutes on high heat then switch to low heat.

4. On the final 5 minutes, add the rock sugar and let it boil for short while before turning off the heat.


My trusted double boiler, a gift from my old ma when we first moved into the house.


Cooling dessert, anyone? 


Tips!
If you don't have a double boiler, just boil using a normal pot with the lid on. You may reduce the time to about 45 minutes to 1 hour.

Important to Note...
While the apricot kernel is known for its benefit in treating cough, it must not be taken in excessive amount. When serving to my little ones I only serve them the pear and the soup, but personally I enjoy chewing these crunchy kernels.

Sunday, June 30, 2013

Fresh Mixed Salad with Homemade Italian Dressing

When making sandwiches or spaghetti, I will usually serve them with fresh fruits or salad so there is a balance of greens and carbo.

This is a really quick salad that can be ready in no time, you can just pre-cut them, keep in the fridge and pour the dressing only right before meal time.


I whipped up this simple Italian salad dressing after studying several food labels at the supermarket. I have not buy store-made salad dressing for a long while, since it only takes me 5 minutes to make this dressing. :)

You may replace the vegetables suggested below depending on your preference, however the lettuce leaves shall remain. My duo enjoyed chewing the lettuce and carrots, but both rejected the bell peppers and cherry tomatoes. At least it's a 50% success.. *wink*


Saturday, June 29, 2013

Homemade Steamed Rolled Buns (man tou) 手制有味花卷馒头

Rolled buns, or man tou (馒头), is one of the traditional favorites in most Chinese families, you can find the freshly made in most dim-sum stores or pre-packed ones in the frozen food section of major supermarkets.

This weekend, I decided to give it a try to make my own homemade rolled buns, since it has always been one of my childhood favorites.

Here they are, the  steamed rolled buns hot from stove. I made them plain this time as I had ran out of pumpkin and sweet potatoes, the next round I shall try to make some dwi-color man tou :)

The raw man tou and twisted rolls, I was testing out various rolling methods as you can see. My favorite is the twisted rolls, but my little boy liked the tower shape most. What about you? :)


Interested to make some? Just read on...

Saturday, May 4, 2013

Sesame Flavored Lady's Fingers 麻油拌羊角豆


In my attempt to introduce more variety of food for my little ones, I decided to try one of my personal favorites, lady's fingers. Surprisingly, my picky little boy liked it and he especially liked all the little seeds, which are indeed cute looking.


Sesame flavored Lady's Fingers


Before going into the recipe, let's have a little sharing about this little pod veggie.

Lady's Fingers, or Okra, is a common locally produced vegetables that is a good source of fiber, vitamin C and antioxidant. My mom used to grow them in our backyard and I love to watch the tiny "fingers" grow. Unfortunately I do not have green fingers like my mom so I can only get from store. Remember to go for okra that is in vibrant/dark green and looks crunchy, which means its fresh.

One important goodness that you should know is that, lady's finger is one of the ideal food that ease constipation condition due to its high dietary fiber and mucilaginous content. It also has low calories and zero cholesterol which makes it an ideal food for people that want to loose weight (check out more on nutrition and you). Quite a guilt-free food it seems. :)

Wednesday, May 1, 2013

Oriental Style Stir Fried Brussels Sprout


I always find Brussels sprouts a rather cute looking vegetables, in fact they look like miniature cabbage or little green footballs :) While it is common in the Europe countries (oh I love the salad!), they are usually sold at quite a high price in KL. Most supermarkets selling them at around RM20 or more for a pack of 20-30 sprouts, however I found some really fresh ones at Mercator  Jusco supermarket yesterday at only half the price, so I decided to give it a try.

Oriental Style Stir Fried Brussels Sprouts


Turn out, we all like it and it's a really simple dish that can be ready in under 10 minutes.

So, give it a try if you have the chance. ;)


Preparation Time: 5 min
Cooking Time: 8min
Serving for: 2-3 persons

Ingredients:
20 Brussels sprouts, cut into half
1 thumb size ginger, cut into thin slices
1 table spoon olive oil
A dash of sesame oil
A pinch of salt

Step-by-Step Guides:

4 simple steps to cooking Brussels Sprout - Cut, Blanch, Drain, Stir Fry.


1. Boil a pot of water, blanch the sprouts with lid on for about 5 minutes. Drain all excess water and set aside.
2. Heat up a table spoon of olive oil in a wok and add the ginger, sauté until the ginger turns golden, then add the sprouts.
3. Drizzles with some sesame oil and a pinch of salt, and stir-fry for about a minute then turn off the heat.

Serve while hot, it's crunchy and I simply love the vivid green of these little baby sprouts!

I cut some leaves and add into my 17 months old baby's porridge, she munched them all away without any complaint, in fact she asked for more. A new variety for my baby girl, yay!

Here's the serving for my little boy, served alongside steamed cod fish and egg omelette, "Fu-yong Dan" (芙蓉蛋)


Don't they look really cute?


Tips!
Brussels sprout taste best when it's crunchy, so make sure you do not overcook them or they will be all soft and mushy.

Some nutrition facts..
I looked up the nutrition info out of curiosity and was pleasantly surprised to know that Brussels sprout is actually a health food with low calories content. It is also rich in Vitamin C and is a good source of anti-oxidant that is said to be good protection for prostate, colon and endometrial cancer.

Read out more nutrition fact here if you are interested.


Wednesday, March 27, 2013

Steamed Egg With Milk and Pumpkins 鲜奶金瓜炖蛋


We got home late tonight but my little boy requested if he can have the steamed egg dessert. Since I had just bought a carton of fresh milk and some eggs, I agreed to making it with him. After all it only took us 20 minutes.

Using the same recipe for the Steamed Egg with Milk and Banana, I used chopped pumpkin cubes and substituted the castor sugar with 1 table spoon of organic raw sugar this time, and it tasted really delicious!


I forgot to warm up the milk before putting them into the steamer, so I steamed them for extra 5 minutes today. The texture of the steamed egg was so smooth that made me feel like a pro this time. >:)

If you managed to try out this recipe, feel free to drop me your photo and I'll upload onto my blog for reference by others..


Friday, March 22, 2013

Steamed Egg with Milk and Banana 香蕉牛奶炖蛋


I was in the mood for dessert tonight, since I was given order by doc to stay home for few days, homemade dessert is the best option I had right now.

So I checked up the fridge, found some milk, eggs and bananas... Just the right ingredient I need for making some steamed custard!

So I referred to my favorite Christine's website and made this banana egg milk custard. It's so easy that it only takes 15min from scratch.


Seen here, the ingredient - 250ml fresh milk, 2 eggs and 2 table spoon of sugar (and 1 banana not in pic). I reduced the sugar instead of 30gm as suggested.

Subsequently I used only 1 table spoon of organic raw sugar, it tasted nice and smooth too. So moving forward I'll opt to use brown sugar or organic raw sugar only for better health benefit.


The egg mixture and the sliced bananas. I whisked the eggs vigorously using a fork then add milk & sugar, only took a good 30 seconds or so.


I used this sift to filter the bubbles in order to achieve the super smooth texture. Pour slowly to avoid overflow and lightly press with a spoon if need to (optional)


Put on the cover (or use a plate instead) onto each bowl and they are ready to enter the steamer. Make sure the water is boiling before you put them into steamer, starts timer right after you close the lid. As seem here, I used a Wok to do the steaming.


Ta da, my super smooth egg milk custard is ready after 12 minutes of steaming (you have to open lid every 4 minutes to let the steam escape, this is the key to ensure a smooth texture).

This is the original version for my big guy.


The banana version for my 15 months old (even lowered sugar content). The steamed banana is so sweet and soft, there's no fear of chocking at all.


It's yummy when serve hot, can taste the freshness of milk and egg in each bite.. I kept a bowl in the fridge for tomorrow cold dessert for my little boy since he liked it so much, I'm pretty certain that it will taste even nicer! :)


You may refer to Christine's original website here for the methods. I follow exactly except for reduction of sugar and addition of the bananas.


Want some Variety?

  • Subsequently I made a Pumpkin Steamed Egg with Milk, tasted really nice, highly recommend you to give it a try!

  • Other substitutes you can used instead of banana or pumpkin: Broccoli stems, asparagus, fresh orange, sweet potato, peaches, button mushrooms. When I have the chance to try them will post the update.

  • What milk? Some asked. I used Pura Australia fresh milk here, however I believe breastmilk will work as well. If any breastfeeding moms had tried using BM to make this dessert, please do share with us here and I'll most certainly upload the photo to share with others!


  • Do take note that....
    Some infant may be allergic to egg (especially egg white), so it is not recommended to serve egg to little ones under 1 year old. Watch out for allergic reaction such as rashes or itchiness if this is the first time you are offering egg based food to your little ones.

    Saturday, March 9, 2013

    Homemade Noodles, again 手工面条做法加食谱


    The handmade noodles I made 2 weeks ago had ran out, so I thought its time to make a new batch, but using a pasta maker this time as I would prefer the noodle to be thinner.

    It was a right decision, the noodles turned out way better this time.

    I made different flavors this time:
    Green noodles - Baby Kai Lan with egg
    Orange noodles - Carrots
    Yellow noodles - Pumpkin
    Purple noodles - Red cabbages


    This time, I let my little chef helped up since he was so interested with the pasta maker. In fact, he self invited himself when he saw me working on the dough. Pulled out the apron and washed the hands, then told me he's ready to help. He has certainly made significant progress! It requires quite some strength to turn the handle but he did a pretty good job.

    Saturday, February 16, 2013

    Colorful Handmade Flat Noodles 手工蔬菜面条


    Baby Claire is starting to get more adventurous with her food nowadays that she always want to eat our food when dining on the same table. As she has 8 teeth now and I can see another 2 more teeth coming out (and how she loves to chew my finger, ouch!), I have been introducing her to more staple food, like bread, Pao, noodles, pasta, cheese crackers, cereal etc, with principle of no or less salt, no sugar, no MSG, no artificial flavoring and no processed food where possible.

    When I saw one lady posted a picture of the homemade noodles she made for her daughter on a Facebook group, I was instantly captivated and thought I can make the same for my baby too! Since there is no detail on measurements given, I decided to give it a try by making my own homemade noodles.

    Look what I've made here.


    Beautiful mixture of spinach noodles (dark green), pumpkin noodles (yellow), tomato noodles (pink) and red cabbage noodles (purple).

    My duo absolutely loved their 4-colors noodles in anchovies soup.

    Little Ethan had his with shredded cheese. He was so fascinated by the colors that he kept asking me what veggie I used. He went grocery shopping with me and I used this chance to teach him the various type of vegetables.


    Baby Claire had hers cut into small bits. she was so fond of her noodles that she kept asking for more, so eventually I top up some from her (which was supposed to be my portion!)


    Ready to make some yummy homemade noodles for your little ones? Lets read on.

    Monday, January 28, 2013

    Baby Food: Healthy Noodle Soup


    Baby C has porridge most of the time, once in a while I'll cook some pasta or noodles for a change of texture and taste. Now that she has 8 teeth, I reduce the cooking time as she enjoys chewing with her tiny teeth.

    This is a simple soup noodle cooked using no added flavoring other than the homemade anchovies powder. Method of preparation for the anchovies powder is available here.

    For baby's early food I will avoid any article coloring/flavoring, additive and will go salt-free if possible. After 2 yo I shall go easy as their digestive systems are more mature.

    Made these noodle soup for baby C lunch and brought the remaining out for second feeding, this way she can eat her noodle the same time we have our meal in restaurant. :)


    Preparation Time: 15 min
    Cooking Time: 15 min
    Serving for: 2 meals


    Ingredients:
    1 noodle (used unbleached, non-oil fried preferred)
    1/4 cup carrots, diced
    1/4 cup sweet potatoes, diced
    1/4 cup cabbage, thinly sliced

    For soup base:
    2 rice bowls of water
    1 teaspoon of anchovies powder

    Step-by-Step Guides:
    1. Boil the water in hot pot, add the anchovies powder, carrots and sweet potatoes.

    2. Cook for 5 minutes with lid closed,
    Then add the cabbage. Boil for another 5 minutes.

    3. Add the noodle and cook for 5 minutes (or according to the time indicated on the packaging). I cook it a bit longer than the suggested timing as I wanted to ensure the noodle is easy to chew for my baby C.

    4. Dish out the noodles, cut into short stripes of about 1cm each so it's easier for baby to eat.

    You can serve the noodles immediately, or you may store them into a thermos for later feeding. When going out, I'll bring the noodles in separate food container and the soup in thermos to avoid the noodle from becoming soggy when served later.


    Useful Reminder
    You may substitute the vegetables according to your preference, but do ensure you cut them into chewable size.

    If serving to younger baby please ensure you cook the vegetables for longer time until you can easily smashed the potatoes and carrots to avoid chocking.

    This is the whole meal noodle I used today, the remaining was used to cook fried noodle for our dinner, it was nice and my little boy loved them too. :)


    Sunday, December 2, 2012

    Rainbow Rice with Fish Nuggets 彩虹饭


    Wouldn't it be nice to have your little ones running to the dinning table for dinner instead of having to drag them to take the meals, or having to keep reminding them to eat the food?

    That was what happened when I told Ethan we are having Rainbow Rice for dinner. He rushed to the dinning table and offered to open up all the covers for me to reveal the rainbow rice underneath. He then happily ate his meal and kept telling daddy that rainbow rice will make him strong (coincidentally he was wearing a super hero pajamas, haha)

    The Rainbow Rice set, with the bowl/cover on (it keeps the rice warm)


    Ta da..

    Thursday, November 22, 2012

    Healthy Alphabet Pasta with Steamed Cod Fish 健康字母意粉


    Tired of feeding your little ones with porridge, porridge and porridge all the time? Why not give it a change this time by introducing tiny alphabet organic pasta. It's yummy and give a different variety to little one's diet.

    I cooked this for my 3.5 yo and 11.5mo today, both of them loved it and finished the entire bowl each. My elder boy had a bigger bowl of course. :)


    A healthy meal for my precious duo - Organic Alphabet Pasta in vegetable soup.

    My Little boy's portion, served with grated cheese and lightly flavored steamed cod fish fillet.


    My baby girl's portion, without the grated cheese.


    Only fresh ingredients are used in this recipe, no canned puree, no packaged stocks, only the good and natural stuff. Where possible, I try to avoid feeding canned / processed food to my baby especially when under 1 yo.

    If you prefer tomato puree version, refer to my earlier post here.


    Preparation Time: 10 min
    Cooking Time: 15 min
    Serving for: 2 little ones

    Ingredients:
    3 palmfull of alphabet pasta

    For vegetable soup base:
    - 1 palmful of purple cabbage, finely chopped
    - 1 medium carrot, diced
    - 1 palmful of pumpkin, diced (I skipped this as I ran out of pumpkin)
    - 1/2 medium onion, finely chopped
    - 1/2 medium tomatoes, diced
    - 1 teaspoon of anchovy powder (refer here for recipe)
    - 1 big table spoon of grated cheddar cheese

    For Vegetarian version, skip the following ingredients.

    For Steamed Cod Fish
    - 1 block of cold fish fillet, about 200gm, completely defrost
    - A few slices of ginger


    Note: you may change the choice of vegetable but tomatoes and carrots shall remain.

    The Making:
    1. Boil a pot of water (about 4 small rice bowls), once boiled, add all the vegetables. Close the lid and let it shimmer for about 5 minutes. You can add some salt into the soup, but I skipped that as I'm using anchovy powder.

    2. In the meanwhile, clean the cod fish,lightly coat with salt and sprinkle with the slice ginger. This is to avoid the fishy smell.

    3. Add the alphabet pasta into the soup. Let it boils for 10 minute (or as per the cooking time indicated on the packaging)

    4. While the pasta is boiling in the pot, steam the cod fish in a steamer on top of the pot of soup for 5 minutes (if the fillet is thicker than 1", steam slightly longer). You can also stem the fish on a separate pot but this is most time and energy efficient way :)

    Note: Use a chopstick or fork to test that the fish is cooked - once it can be easily separated when poked, the fish is ready.

    5. Turn off the stove. Sprinkle with some anchovy powder.

    6. Serve pasta in a shallow dish, add a big spoonful of grated cheddar cheese on top for added taste and nutrition.

    7. Lay the steamed cod fish on top. For elder toddler (above 2 yo), add a few drops of light soya sauce and sesame oil to add flavor for the fish.


    The pasta taste best when serve hot, as the cheese will melt in the pasta and give it a nice natural aroma.


    This is the organic pasta I used for this post.

    Useful tips!
    1. Some infants may be allergic to cheese, so for first time feeding, give a small amount and observe for possible allergy sign such as rashes, itchiness etc.

    2. For baby between 8mo-12mo, you can boil the soup base for slightly longer so the carrots are thoroughly soften.


    A Note about Salt in Baby's Food
    Most if not all books and sites I read advised against adding salt, sugar or any artificial flavoring into baby's food, this is to avoid them from becoming a picky eater at young age and most importantly, for health reason. Excess salt may be harmful to baby's kidney at such young age and some processed food already contain certain amount of salt in them.

    I have did some reading about salt & sodium for little ones, do read on more here if you are interested..


    C'ya!

    Sunday, September 2, 2012

    Stir Fried Udon with Mixed Veggies 香丝炒乌东面


    I tried cooking udon soup once and it was a disaster; the noodle turned out soggy and I had to threw it away. So I've learnt, udon, unlike any other noodles or pasta, need the shortest possible cooking time - 1 minute maximum.

    So today I tried making fried udon noddles for lunch, it was a big relief that it turned out just nice and both my little boy and big guy loved it. Ethan came to me and said "mommy, I like the noodle, thank you for cooking!"

    This is quite a quick meal, took me 30 minutes from chopping, cooking to serving. Will definitely make this again.

    Stir Fried Udon with Mixed Veggies


    Preparation Time: 10 minutes
    Cooking Time: 8 minutes
    Serving for: 3 persons

    Ingredients:
    2 packs of udon noddles (about 200gm per pack)
    4 cloves of garlic, finely chopped
    20 stalks of asparagus, cut into long strips
    1 fresh carrots, cut into long strips
    12 brown mushrooms, cleaned and halved
    4 slices of hams, cut into long strips (skip this for a vegetarian fried udon)

    Seasoning:
    2 table spoons premium soya sauce
    1 teaspoon thick soya sauce (optional)
    Dash of black pepper (used sparingly if you are cooking for little ones)
    Dash of sesame oils

    Cooking Methods:
    1. Heat up 2 spoons of cooking oil in a wok or a deep frying pan, sauté the garlic until golden brown. Set a side the garlic but leave the oil in the pan.
    2. Add carrot strips, asparagus into the pan, stir fry for about 3 minutes, then add the mushrooms and stir fry for another 3 minutes. Drop in the ham slices and season with soya sauce and white pepper.
    3. Add the udon into the hot pan. Season with the Seasoning (as above). Stir the udon for a minute to mix evenly, turn off the heat and serve immediately.

    Serving for my little boy, he liked it!


    Serving for my little boy, he set the table himself :)


    Tips for serving:


  • Before serving, top with some shredded cucumbers or shredded fried eggs.


  • I rinse the udon with some boiled water before cooking although not its not necessary


  • Udon cooked very fast, so make sure you do not cook it more than a minute.


  • The fresh ingredients


    Stir frying in action.. Looking delicious!


    Served with chili and lime from our garden.. my favorite!