Saturday, August 16, 2014

Potato n Mushrooms Rösti, inspired by the Swiss


During our recent family trip to Westerner Europe, Rösti is one of the common dishes we often found on the recipes of many restaurants in Germany and French towns (besides bratswurst, of course), however later only we found out that Rösti is actually consider a national dish to Switzerland. No wonder it was offered at Marche, the international chain from Switzerland.  

Anyway, when we first tried it in Colmar, the enhanting Alsace town which our Bukit Tinggi is modeled after, it was piping hot and was really mouth watering. I am not sure it's because of the hyper mode we were in, the sizzling summer or the beautiful town that inspired us, but some how the crispy bacons and mushroom slices had a special chemistry with the soft mushy texture of the grated potatoes. It is aurally a common farmer dish, using inexpensive ingredients, easy to prepare and is filling to the tummy, but tasty none the less.

The traditional Rösti is actually just a potato pancake with nothing added, what we had was very much the luxury version loaded with more ingredients and cheese, I decided to give it a try back home and it turned out alright, but I need a but more practise flipping it.

Rosti. the copy cat style

Ingredients:

  • 6 medium potatoes, washed 
  • 1/2 onion, diced
  • 100gm streak bacons, thinly sliced
  • 6 brown mushrooms, thinly sliced
  • 2 clove garlic, diced
  • 2 big spoon of shredded cheddar cheese 
  • 2 teaspoon rosemary 
  • Salt & pepper to taste 

Preparation time: 25 minutes
Cooking time: 25 minutes 
Serving for: 3-4 pax

The ingredient. I boiled too many potatoes, you really just need 6


Grating the potatoes

Methods:

1. In a pot of hot water, boil the potatoes for 5 - 7 minutes. To test if it's ready, poke the potato with a fork and it shall be still firm but can poked through with ease. Let the potatoes cool before use.

2. Stir fry the mushrooms and onions for about a minute, set aside.
3. Peel the cooled potatoes and coarsely grate them (must be cooled completely else will be difficult to peel). Mix all ingredients in a plate, including the cheese.

4. Heat up 2 table spoon of olive oil (or butter) in a 8" pan, spread the Rösti mixture evenly over the pan. Cook both side for 5 minutes or until it turns golden brown.

5. Serve!


Homemade rosti, with our beautiful Hansi glass from Colmar


Saturday, July 26, 2014

{Travel Special}Tortellini In White Sauce


This blog has been quiet recently as I have been away for our family trip. It's the time of the year to be away from work, chores and just be on adventure with our little ones.

While we opt to enjoy local food and drink most of the time, places like Switzerland is just way too costly to dine out (imagine paying RM60 for one simple Burger King set), and sometimes after a long day out the little ones were just too exhausted to walk anymore (it's a DIY trip). These are the moments that call for simple home-cook. 

I got all the ingredients from the local marché (market) and cooked this simple pasta in white sauce with ham. Only took me 20 minutes and it was a really satisfying meal for everyone.


Preparation Time: 5 min
Cooking Time: 15 min
Serving for: 3-4 pax

Ingredients:


All fresh from the market:

• 300gm Tortellini pasta
• 1 cup of fresh milk 
• 1 packet of butter (above 1 spoonful)
• 100gm of ham, finely sliced
• 2 big spoon of cheddar cheese, roughly cut into cubes
• 1 egg (I did not buy any, so skipped)
• 8 brown mushrooms, briefly washed and sliced
• 6 sweet peas, washed and cut (in replacement for lack of basil leaves)
• salt & pepper to taste


The Making:
1. Melt the butter in a hot pan, toss in the mushrooms, stir fry for a minute then add in the sweet peas and ham. 

2. Let cook for about a minute, then add the milk, egg and cheese cubes. 

3. Let it boil for a minute or more until the cheese melted, add the Tortellini pasta, basil leaves and salt & pepper to taste. 

4. Close the lid and let the pasta simmer in the sauce for 10 minutes. If it gets too dry, add a little more milk.

5.Garnish with some basil leaves and serve hot. 

Bon appetite! 


Just some Tips for Cooking while Travelling: 

• opt for apartment / motel where kitchenette are provided so simple cooking is possible. In absence of kitchenette, can make sandwiches instead.

• Keep few packet of butters from the airplane meal or hotel buffet, it is great replacement for cooking oil (no point buying a bottle of cooking oil just to cook one meal! ;)

Thursday, July 17, 2014

Feeding Essentials for Little Ones, From 6 Months to Toddler Age


I have been sharing quite a number of recipes for little ones, this time let's talk about the feeding utensils to use for little ones, from 6 months old to toddler year. The principles that I subscribed to are simple:
  • Buy only items that are reusable, good quality and that are safe for toddler - non toxic, BPA free, no sharp edges.
  • Go for practical design with reasonable price, buying the most expensive of the range or branded imported products may not make one a good parent automatically; instead, invest in getting quality food or ingredients.   
It is a mixer of fun and painful experience for new parents when it comes to introducing food to the little ones, especially if you have a picky one. Hopefully this articles helps to give some pointers on what are the essential tools to spend on for this journey so at least it would not be a pricey one. :)


The Beginner 
6 Months - 18 months old

At this stage, the little ones are exposed to solid food for the first time and in the first few months, they spend more time exploring their taste buds and rely mostly on the parent or caretaker to spoon feed them. Nothing fancy required, just practical tools that make feeding a mess-less chore. 

Essentials: 
• Feeding spoons
• Bowls & Container
• High Chair
• Bib
• Food blender 

You may check out recipes suitable for 6 Months+ or more choices here.


• Feeding Spoons
I like Take & Toss for the no-frill, practical design, and the length & width are just nice fore the little mouth. While there are a lot more fancy choices such as spoon that changes color according to temperature but I find it, errrr... a bit of an overkill. You can easily check the food temperature by touching the bowl or test a drop on the back of your palm, the most basic method will do. When the the little ones moved into next step where they are ready to self feed, the length of these spoons and forks are just ideal. You can even retire them as the cooking toy (masak-masak) when the little ones grew out of them.


* knife is not really required at this stage


• Bowls & Containers
I like these reusable Snack cups that are BPA free, microwave safe, dishwasher safe, freezer safe and can double as storage box for rice cereals, porridge or cut fruits. I used these a lot and each one is just perfect for single feeding.

When traveling short distance, you can put the frozen purée in these storage containers and place in a cooler box. When feeding, thaw over a bowl of hot water and you can feed directly from the storage container. Really convenient and mess free.


• Bibs
You may opt for cute little cloth bibs that are absorbent and made little ones looking so adorable, but they can be quite difficult to clean to have all the food stains removed. While these are simply too cute to resist, I would recommend to use them for teething purpose (the nonstop saliva and drool!) and to spoon feed little ones, not when they started self feeding (unless you don't mind all the washing...)


When little ones started to self feed, I would recommend these soft plastic bib that comes with pocket at the bottom (ideal for catching dropping liquid). You may choose the thick plastic or the soft foldable type which I find is more practice - can easily rolled up and pack in the nappy bag.

Notice the deep pocket?


You may even opt for a cover-all wear on bib, personally I find it not so practice for our tropical weather that is super hot and humid. So never venture into that...

Conclusion? The choices are aplenty in all the baby stores, just choose wisely. After all only need the bib for first year of feeding. 


• Baby High Chair
For high chair, we went with something practical - IKEA high chair that almost 1 in every 5 young family would have one at home. 

We had one for 5 years and still look new as the first day we bought it. It's easy to clean, practical, and we personalized it by using different stickers - with one of our little ones' favorite Disney characters, Jack & the Neverland pirates.

We got another portable high chair for traveling purpose - Fisher Price Portable High Chair. It is light weight, easy to clean and can be folded into a box size with a handle so is truly portable. I like that the tray comes with a cover and can be removed for washing. The seat is adjustable to suit different heights so we can actually use this unit for our little ones from 6m+ up to 2 years old.


• Food Blender
Between 6 to 8 months, the little ones still require intake of mushy food such as purée or soupy food, so you may need a blender to prepare the purée or cereal. While there are many baby food processors available in the market nowadays, I would recommend for a conventional hand mixer. My favorite thus far is the Moulinex Hand Mixer with multiple foots that allows it to blend, mince, crush ice and emulsify. It is easy to clean and only requires minimal storage space.


While a special designed baby food processor may help to reduce the preparation time. You only need it for few months, subsequently the little ones may prefer semi-solid or solid food such as noodles, rice, congee etc, which doesn't require a blender anymore. While the conventional hand blender will remain an useful addition in your kitchen, a baby food processor on the other hand, may be redundant. (I stand corrected on this, but I really like my hand mixer which I am still using till to date).


The Wobbly Years  
18 months - 3 years old

This is the stage to start introducing self feeding (I started my girl at 13 months, it really depends on the little one's readiness), so it is important to provide cutlery sets that are easily manageable by the little ones and are attractive in design to capture their interest.

Essentials at this stage:
• water proof bib with pocket
• spoon & fork
• food scissor
• snack box & storage box
• plate & soup bowl

You may check out recipes suitable for 2-3 years here.


• Toddler Food Scissors
Get a pair of round tip scissors with cover, can use it at home or when visiting restaurant, it can be handy with noodles, pasta, meats or vegetables. You can easily find a pair of such scissors from stationary stores, we got ours for only RM5. 


Toddler Cutlery Set
Opt for plastic cutlery set that are BPA free, one with wide bottom so less chance of spillage. We have been using these IKEA Smaka bowls and they serve the purpose well.

Suggest to opt for plain color that are vibrant and captivating.


Placemat
Get some cute looking placemats. Besides looking cute and keeping the little ones interested, a placemat also helps in "damage control" - don't underestimate the level of messiness when you decide to let little ones self-feed. ;)

We have been using the IKEA Trova placemats until we made out own custom-made placemats with our little one's artwork. You may read up more about it here.


The Confident Toddler 
3 Years Onward

By now, little ones shall be well trained to self feeding and can confidently dine with little assistant from the adults. 

The essentials at this stage:
• Solid spoon, fork & knife 
• Plate & soup bowl
• chopsticks & chopsticks trainer 

You may check out recipes suitable for 3 Years or 4 Years onward here or all ages recipes too.


• Foldable Cutlery Set
Our favorite choice when going out with the kiddos has got to be these FUEL foldable cutlery sets. Trendy, easy to store (just fold it!), and very practice design. The handle offers good grip for the small hands and the size of the cutlery are just nice for the little mouths.

We got ours when traveling in Australia few years back, nowadays we often see Fuel cutlery sets available in major departmental stores such as Parkson.


Different colors for easy differentiation. I made a cutlery pouch for storing the sets for the siblings.


Toddler Trainer Chopsticks 
We usually dine using chopsticks when serving Chinese dishes or noodles. Little ones are curious to try out the chopsticks so this trainer set comes handy, this bunny chopstick holders which can easily cap onto any chopsticks. It helps the little fingers to learn holding and grip onto the food, which is a good form of fine motor training for the little fingers. Our little boy is able to use his chopsticks well after few meals with the help of this bunny trainer. :) 
You can easily find these chopsticks trainer in home improvement or departmental stores.

There are many other items and appliances that baby stores may offer and one may be enticed to purchased, I am just listing what are the essential based on my personal experience. So just be a wise consumer and spend wisely. ;)
Do note that the suggested stages above may differ for your little one as not every child has the same development path. There is no need to compare your little one with others (unless there is a real reason to concern on the progress), just need to have some patient to guide them and enjoy the journey which contributes to the overall parenthood experience. 

Have a question? Feel free to post below. :)

Cheers!


Saturday, July 12, 2014

Spaghetti with Baby Spinach


My duo love spaghetti, noodles, vermicelli... Anything that is stringy and chewy. So again I'm cooking spaghetti for lunch today and I loaded it with baby spinach, the one leafy veggie that is perfect for little ones, and top it with some Teriyaki chicken strips. Simple and delicious lunch, ready in no time.


My little ones had 2 plateful each and their plates were all cleaned. They don't usually like leafy veggie due to the fiber, but this baby spinach was well accepted as it is easy to chew and blends well with the pasta.

So, if you have picky little one who does not like their greens, do give this a try. ;)


Preparation Time: 8 min
Cooking Time: 15 min
Serving for: 3-4 pax

Ingredients:
1/2 packets of spaghetti 
200gm chicken breast, cut into short strips
12 stalks of baby spinach, cut into chunks about 5cm long
1/2 medium carrot, thinly sliced
 2 clove of garlic, sliced
3 eggs, beaten and add a teaspoon of soy sauce & pepper
1 table spoon soy sauce
1 teaspoon of of salt

Chicken Marinate:
1 tablespoon of teriyaki sauce
1 teaspoon of salt
A few drops of sesame oil 
A dash of pepper

The Making:
1. Boil a pot of water, cook the spaghetti according to the time suggested on the packaging (about 12 minutes). Blanch and set aside, add few drops of olive oil to avoid the spaghetti from sticking together.

2. While the spaghetti is cooking, season the chicken breast. Heat a table spoon of olive oil, pan fry the egg liquid to make a large Omelette. Using the spatula, roughly cut the omelette and set aside. 

3. Heat up a tablespoon of olive oil, toss the chicken strips into the pan and pan fry each side for about 2 minutes until the meat is cooked. Set aside.

4. In the same pan, heat up 2 table spoons of olive oil, toss in the garlic and saute till golden brown. Add the carrot slices, stir fry for about 2 minutes then add the spaghetti and spinach. 

5. Add about a cup of water, a teaspoon of salt and a tablespoon of soy sauce into the pan, stir to mix well then close the lid and let it simmers for approximate 5 minutes. 

6. Toss the Omelete into the spaghetti and mix well. Let it cook for another 1-2 minutes, then turn off the heat and your spaghetti is ready to serve. Just don't forget to top the teriyaki chicken strips on top before serving. ;)


Saturday, July 5, 2014

Easy Healtilicious Pumpkin Soup

This is one nutritious recipe suitable for young and old ones. Smooth, flavorful and full of goodness. Pumpkin soup is one of my little ones' favorite soup whenever we patronage western restaurant, but it really is quite easy to make at home kitchen. I have ran out of milk at home otherwise the texture will be even creamier. 

This soup is ideal for infant too, with just pumpkin, garlic and onion, it's one nutritious early food for your little ones. Just skip the cinnamon, salt and fresh milk.


Preparation Time: 10 min 
Cooking Time: 30 min
Serving for: 4-5 person

Ingredients:
1 medium pumpkin, cut into cubes and wash
1 whole onion, finely chopped 
1 garlic clove, finely chopped
900ml / 6 rice bowls of water or stock
300ml fresh milk (or replace with water / stock)
A dash of cinnamon 
A dash of salt to taste
2-3 slices of bread 


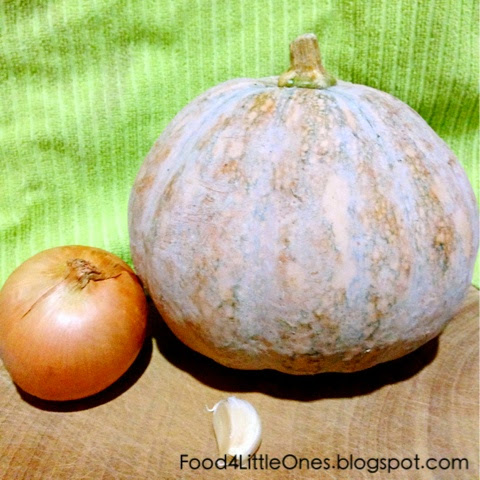
Essentially, these are what you need to make this soup.


The Making:
1. Heat a table spoon of olive oil in a pot, add in the chopped garlic and onion, stir fry for about a minutes until the onion turns translucent. Add in the pumpkin cubes and cook with lid on for about 3 minutes. 

2. Add in the water or stock, let it simmers on high heat for 5 minutes then switch to low heat. Cook for approximately 25 minutes or until the pumpkin cubes turn mushy. 

3. Add in the milk and let it simmer for another 5 minutes. Unfortunately I've ran out of milk so I used only water.

4. Turn off the heat. Using a hand blender, blend the soup directly in the pot for about 2 minutes on high speed, until no lumps observe.


Prepare the croutons:

5. Using a separate pan, melt a small lump of butter and pan fry the bread on both sides until it turns golden brown and with crunchy edges. Cut into cubes or long strips and drop into the pumpkin soup when serving.


Yums..... Hot and aromatic pumpkin soups to warm the tummy on a rainy night! Now I'm going to keep a small pot for my old ma who has been ill, this shall do her good.


Just for Sharing..
Pumpkin is high in fiber and a good source of beta-carotene, anti-oxidant, vitamin A and is low in calories. It also has high level of potassium which is needed to keep our muscles and heart working at optimum level. So, if you are not a pumpkin lover, perhaps you may re-consider this pumpkin soup in view of it's many benefits.. ;)


Sunday, June 22, 2014

{Homecook} Just another Simple Luncheon


Today is just another day of simple homecook food for a lay-back lunch, mostly veggies as you can see, with some chicken fillets and seeds for a balanced nutrition intake. A healthy meal such as this only cost us no more than RM20 and less than an hour to prepare.


I like to things in order, so I got all ingredients nicely prepared before I started cooking. 

Beans & Fingers
Just simple stir fried with olive oil. Lady fingers are good for bowel movement. I don't have a recipe for this, but the cooking is similar for this crunchy veggie dish.


Cherry Tomato Omelette
Added some lotus seeds for a twist of taste and natural source of protein and magnesium. This is a dish that is also high in antioxidant thanks to the cherry tomatoes. Recipe available here.


Cabbage with Glass noodles
One of my little ones' favorite, the glass noodles. Just soak it in water for about a minute and add it into the wok after the carrots and bell peppers starting to get soften. 


Simple hearthy meal for the family, the way we like it. Little ones emptied their plate joyfully and we don't have to sweat driving out to the mall to join the weekend crowds.


Just a Tip..
After each dish is done I will wash up dishes immediately while waiting for the oil to heat up for next dish, so I don't have a whole sink of dirty dishes to wash after cooking, which I really really dislike. If you are lucky enough to have a dish washer at home, good for you.... ;)


Saturday, June 14, 2014

Mini No Bake Orange Oreo Cheesecake


For this Father's Day, I thought of just having a simple celebration with Big Guy and the little ones at home, for the benefit of our expanding waist lines due to lack of exercise. Guess finding time to work out is common problem for FT working moms or stay at home moms.  So while the elder was out for his swimming lesson with the daddy, I made these little cuppies and when they were home an hour plus later, it's ready to serve! 


I didn't have any heavy cream or sour cream at home, so I used the recipe that calls for yogurt instead. This is pretty much a trial attempt, I didn't even use proper measurement as I'm only making 4, so a lot of estimation and test tasting involved.

Glad they came out alright and everyone enjoyed it. 


Ready to make some? Here it goes...

Preparation Time: 15 minutes
Waiting Time: 1 hour
Serve for: 4-6 medium cupcake size

Ingredients:

(A) For the base
6 tablespoon Oreo cookies crumbs
1 table spoon melted butter

(B) For the Cheesecake
 
227g cream cheese (1 tube)
1/2 teaspoon orange zest 
4 teaspoon sugar
1 medium orange, juiced
2 teaspoon gelatin powder
113gm or 1/2 cup plain or vanilla flavored yogurt
2 tablespoon of Oreo crumbs (optional)


The Making:
1. Line 4 medium cupcake holders with paper cupcakes. Use the most basic one as you will remove them before servig, or use a silicon cupcake holders instead.

2. Mix the melted butter with Oreo crumbs (short cut: heat up the mixture in microwave for 20-30 seconds!).  Using a spoon, press the mixture onto the base of a cupcake holder for up to about 2cm height.

3. Mix gelatin and the orange juice, stir to mix well and leave aside. We'll come to it later.

4. In a clean mixer bowl, mix sugar, cream cheese and orange zest, whisk till it reaches a creamy and smooth texture (there shall not be any more lumps)

5. Heat up the gelatin orange juice in microwave for 20 seconds (too little to use a stove for this task). stir to reduce the heat and mix it into the cream cheese mix. Add some Oreo crumbs if you are a Cookie Monster like me.

6. Scoop the cream cheese mixtures into the cupcakes laid with Oreo crumbs. Tap lightly on table top to avoid holes in the cream cheese mixtures. Sprinkles some chocolate chip on top.

7. Chill the cheesecakes for at least an hour before serving. Dig in and enjoy!

Simple, isn't it? I told you so. *wink*

Happy Father's Day! 


Original recipe adopted and modified from My Kitchen Snippets. She has tons of interesting recipes there..


Tips!

• If you can't find ready packed Oreo crumbs (normally available under bakery section), you can use normal Oreo cookies, just remove the cream filling and crush the cookies using a rolling pin.

• Have a sweet tooth? Increase the sugar used. I have reduced the amount of sugar used by at least half as I do not encourage too much sugar in my kiddos' diet to avoid them from getting hyper active.

Monday, June 9, 2014

Luohan Guo Mixed Herb Drink for Cough 罗汉果蜜枣止咳汤

Bilingual | 双语版


My little ones had been coughing for few  weeks and recently passed the bugs to me, not long after recovered and finished their full round of medicine course, the cough just slowly creeps back again and it is real heartache to see them suffer.

So I decided to introduce traditional herbs this time. Right after they had completed the cough mixtures and flu medication prescribed by paediatrician, I started making traditional Chinese herbal soup after visiting our local Chinese medical hall. I boiled this soup and the Double-Boiled Pearl with Rock Sugar on alternate day for a week, and we are now all well and free from cough... No more noisy "orchestra" in the house!

So I thought its worth sharing with readers whom may have experienced long term recurrence cough. However, do note that since every body may react differently to the herbs, I would suggest you get advise from your local Chinese medicine hall if in doubt.

最近两个小瓜相续咳嗽了好几个星期,小儿科医生给的药吃完了但依然不能治根,还把咳嗽传了给我,所以我到中药房找了止咳汤配方。和着冰糖雪梨汤,相隔喝了一星期后我们三人都相续痊愈了,不再每晚上演咳嗽演奏曲。

分享这个止咳汤,希望对你也有帮助。不过每个人体质和病症不同,个人建议你到相熟的中药师询问意见为佳。


材料 Ingredients:

罗汉果 一粒,敲裂 LuoHan Guo fruit, 1 (lightly crack the shell)
柿饼 一个 Dried Persimmon, 1
南杏北杏 30颗 Sweet & Bitter Apricot kernels, about 30
蜜枣 5-6粒 Candied dates, 5-6
桑叶 一把 Mulberry leaves, 1 palmful
清水 八饭碗 water, 8 rice bowls

做法 The Methods:

1. Briefly wash all ingredient, put them in a pot and boil on high heat for 5 minutes. Then switch to low heat and let it continue boiling for another 45 minutes. It would reduce to about 6 bowls of water. 把所有材料洗净,放入锅里大火滚五分钟然后转小火,滚大约40分钟后熄火。

2. Let the drink cool to room temperature before consuming. 倘凉后即可饮用。


All of us had 2 small bowls of the drink each, it tasted pleasantly sweet and you may eat the apricot kernel, which is crunchy like nuts.

Useful Tips (speaking from experience...)
• avoid air-conditioner when sleeping, turn on the fan or keep the window opened instead (if safety is not an issue in your area) 
• avoid consuming cold water and cold fruits, however room temperature is alright.
• if you have a humidifier at home, add few drops of eucalyptus oil before  sleeping and elevate the pillow, this shall ease breathing difficulty cause by block nose. 


温馨叮咛:
• 晚上入睡时避免开冷气,自然风或风扇为佳。
• 冷水、冰箱的水果尽量避免(室内温度的水果不妨)
• 家里有humidifier的话,睡觉时可以加几滴由加利油,枕高枕头,帮助呼吸好入眠。