Showing posts with label kids meal. Show all posts

Sunday, February 21, 2016

Double Style Sesame Chicken Nuggets


This is a fast and easy dish that is crunchlicious and suitable for any occasion, be it family dinner, friends gathering or even picnic. The white sesame coating over the nuggets adds a subtle aroma and adds to the crunchiness. 

Why double style? I made a non spicy version (sesame) and a spicy version (sesame + paprika), everyone can just pick their favorites, or have both. ;)

Served the Sesame Chicken Nuggets with 3 different sauces, so there's at least a flavor that suits everyone :- hot Sambal, Sesame sauce and mayonnaise.


I had it served as part of our family's CNY luncheon. The whole big plate was emptied before the lunch was over.


Preparation Time: 10 minutes
Cooking Time: 30 minutes
Serving for: approximate 40-50 nuggets

Ingredients:
• 800gm chicken fillets, cut into cubes

For Seasoning:
• salt and pepper  
• few drops of sesame oil
• 1 tablespoon of Shao Xin wine (skip if serving for young kids)

For Coating:
• 4 tablespoon of flour + 1 tablespoon of cornflour
• 2 egg whites
• 1/2 cup of white sesame seeds

For Hot version:
• few dash of paprika powder 
 
The Making:
1. Marinate the chicken nuggets with the salt, sesame oil and Shao Xin wine. Set aside for about 30minutes.

2. Coat the chicken nuggets with the following in sequence: 1) mixed flour 2) egg white 3) white sesame seeds. 

For the hot version, add few dash of Paprika powder into the flour and mix well.


3. Heat up few spoonful of cooking oil in a frying pan. Once the oil in heated, using a pair of long chopsticks or thong, slowly place the chicken nuggets into the pan; you may cook few nuggets at the same time, just make sure they do not overlap.

4. Cook each nuggets for about 1 minute on each side or until golden brown. Dish out and put over a piece of kitchen towel to absorb the excess oil.

Serve alongside your favorite sauce (tomato ketchup, chili sauce, Sambal chili, mayonnaise, peanut sauce, sesame sauce). Enjoy!

Saturday, February 7, 2015

"Kung Pow" Chicken Junior 小宝鸡丁


One of the common dishes you can find in any Chinese restaurant is Kung Pao Chicken, 宫保鸡丁, the chicken cutlets are deep fried then stir fry with dark soy sauce and dried chillies, making it a sweet and spicy dish that is often a favorite to many. Unfortunately my duo won't take spicy food, so I tried to make a replica of this dish but minus the dried chili and over rich sauces.

I choose not to deep fried the chicken cutlets, so they remain juicy and succulent and not too hard to chew for kiddos or old folks.


Preparation time: 10 minutes
Cooking time: 10 minutes
Serving for: approximate 4 pax

Ingredients:
• 300gm chicken cutlets (I used chickenbreast)
• 2 glove garlic, finely chopped
• 1/2 green bell pepper, cut into cubes
• 1/2 yellow bell pepper, cut into cubes
• 1/2 red bell pepper, cut into cubes
• 2 tablespoon roasted cashe nuts (I replaced with pan fried white sesame)

Marinate:
• 1 teaspoon salt
• 1 tablespoon soy sauce
• 1 tablespoon dark soy sauce
• 1 teaspoon sesame oil 
•  a dash of pepper
• 1 teaspoon of brown sugar 
• 1 tablespoon of corn flour 

The Making:
1. Rub the chicken cutlets with salt and marinate them for at least half an hour.

2. Heat up 4 table spoon of cooking oil in the wok, toss in the chicken cutlets and let them cook for about 3 minutes. Dish out and set aside but leave the oil in the wok.

3. Toss the chopped garlic into the wok, once it turns golden brown, add the bell peppers, cook for about 2-3 minutes until they are all cook, toss in the chicken cutlets and mix well.

4. Sprinkled with some roasted cashew nuts or white sesame on top then serve hot. 

Absolutely no dipping sauce is required as this dish is so tasty to eat just as-is!

Enjoy. ;)

Sunday, February 1, 2015

PH's Crispy Popcorn Chicken


My duo absolutely love chicken fingers, chicken nuggets, fish nuggets, basically anything crispy and crunchy. But never once I brought them to McDonald's nor KFC, fast food is a big no no to us. I always believe real food is the healthiest choice.

Once in a while I will cook them fried food  and when we read about the crispy chicken recipe on the newspaper recently, little E were so excited and repeatedly requested me to make for them. So I did, with a little adjustment to the recipe.

Want to know the secret to extra crispy fried chicken? It is unbelievably easy, just double coat! Double dip in the egg and corn flour, and the result? Extra crispy fries chicken that you can't stop wanting more. That's what I called this the Popcorn Chicken.. :)


Without breadcrumbs coating.


Daddy & mommy had chicken steak instead. With lots of green salad.


Ingredients:
• 300gm chicken cutlets
• 1 teaspoon salt
• 1 tablespoon soy sauce
• 1 teaspoon sesame oil
• 1/2 teaspoon sugar 
• 1 tablespoon Shao Xin rice wine
• a dash of pepper

For Coating:
• 1 egg, beaten
• 2 tablespoon corn flour
• love it extra crunchy? Add 2 tablespoon of breadcrumbs for coating!

The Making:


1. Marinate the chicken cutlets at least an hour before cooking. Coat the chicken cutlet with a layer of egg liquid, following by a thins her of corn flour; repeat same step, then follow by a coat of breadcrumb last

2. Heat up sufficient amount of cooking oil in the wok (enough to cover the cutlets), once the oil is hot enough, gently toss in the chicken cutlets, keep some space between each piece.

3. Let the chicken fry for about 5 minutes before removing them from the wok. Drip the excess oil on kitchen napkin.

Let the chicken popcorns cold down before you start popping them into your mouth. My duo were so happy when they saw what we were having for lunch, they quickly helped me setup the table and sat down quietly to wait for their meals to be served. LOL. They had at least 7 popcorns each and it's such a blessing to watch them enjoy their food with such satisfying smile.

Hope you like this recipe!


Friday, January 23, 2015

One Pot Chicken Rice 简易饭锅鸡饭


I was kind of lazy lately (that explains the lack of update on my blog) and have been cooking mostly one-pot dishes. Today I'm sharing a really simple rice cooker chicken rice, easy to prepare yet delicious, my boy was hopping in excitement when he smell the nice aroma steaming out from the rice cooker.


Served with simple anchovies veggie soup. Absolutely MSG and nonsense-free meal.

Preparation Time: 10min 
Cooking Time: 30min
Serving for: approximate 3-4 pax

Ingredients:

For the Chicken & Marinate
• 4 chicken drumsticks, deboned and cut into strips (you may used chicken cutlets too, but I prefer to use drumstick for this meal as it has softer texture)
• 1 carrot, cut into big cubes
• 1 potato, cut into big cubes (I skipped this as my potatoes had sprouted.. Sigh)
• 2 cloves garlic, chopped 
• 2 tablespoons premium soy sauce
• 1 teaspoon salt
• 1 tablespoon dark soy sauce
• 1 teaspoon Shao Xin rice wine (optional, but this certainly enhances the taste of the meat)
• few drops of sesame oil 
• a dash of pepper
• 1 tablespoon corn flour 

For the Rice
• 2 cups rice & water

The Making:
1. Clean the chicken cutlets, rub evenly with salt and marinate with all the ingredients and coat with corn flour last. Let it marinates for at least 30 minutes. 

2. Before you start cooking the chicken, cook your rice with normal water level.


3. Heat up 2 tablespoon of cooking oil on a wok, sauté the garlic till fragrance, then add the carrot and potato cubes. Cover the wok and let it simmers for about 5 minutes till soften.

4. Toss in the chicken strips, stir fry till the chicken is cooked (turns pale color), add a cup of water and let it simmer for about 10 minutes on low heat.

5. About 10 minutes before the rice is cooked (just estimate), pour the chicken and sauce into the rice cooker. Cover all over the rice and close the lid to let it continue cooking. Do Not Stir.

Ta-da, the steaming hot chicken rice is ready. Mix the rice with the chicken before serving and enjoy your tummy warming meal. 


Sunday, December 14, 2014

Homemade Potato Croquettes, simply too good to resist!


Little guy and I were making potato bread earlier and we have half a bowl of mashed potatoes left, the recipe only calls for 50gm of mashed potatoes but the one large potato we boiled was nearly 140gm. 

So what to do with the leftover mashed? I decided to make some creamy & crunchy potato croquettes, and it became the most popular dish on my dinner table tonight.


Don't get fooled by its rather uninteresting appearance, it is actually better than chicken nuggets sold in the fast food store. ;) 


Preparation Time: 25 minutes
Cooking Time: 10 minutes 
Serving for: approximate 8 medium croquettes 


Ingredients:

Ingredient A
• 1/2 large potato, washed (approx 80g)
• 1 teaspoon of salt
• 1 slice cheddar cheese or approx 15g block cheddar cheese, cut into small cubes 
• 1 teaspoon of basil leaves
• 1 large egg, beaten

Ingredient B (For Coating)
• 2 tablespoon bread crumbs 
• 2 tablespoon corn flour 


The Making:
1. Boil the potato with skin in a pot of boiling water for 20 minutes. Remove from the water, let cold and peel of the skin. Cut the potato into large cubes and mash them by pressing firmly with the back of a fork. 

2. Mix the mashed potatoes with all ingredient A. Shape them into oval shape patties of your desired size (I made them about 5cm long).

3. Coat the patties evenly with corn flour follows by a generous layer of bread crumb.

4. Heat up the pan with about 4 table spoon of coking oil, cook each side of the potato croquette for about 3 minutes or until golden brown. 

5. Absorb excessive oil with a kitchen napkin, serve as-is or with  your favorite sauce.

My kiddos and Big Guy enjoyed these so much, my boy actually gave me a double thumb ups! LOL.

Useful Tips:
• I added some small potato cubes into the patty to give some twist to the otherwise soft croquettes.
• I like to make my potato croquettes thin (about 1" thickness) so it is really crunchy on the outside and creamy on the inside. Even I couldn't resist eating a few pieces of these delicious treats! 


Sunday, November 9, 2014

Japanese Sauce Pasta, Simple One Pot Lunch


When we first visited Pasta Zanmai, the Japanese restaurant, I fell in love with their signature peanut sauce pasta, surprisingly the peanut paste which I thought would be too thick actually paired well with the pasta.

Since I bought a bottle of roasted peanut sauce recently during a Japanese food fair, I thought to use it to make some Japanese pasta similar to the ones we had in Pasta Zanmai, and it turned out surprisingly well!


My Japanese Peanut Sauce Pasta, served with some crunchy chicken fillet, another favorite dish of my kiddos. The whole pot of pasta was finished under 30 minutes.


This is the key ingredient - Roasted Peanut Sauce, can be used as salad dressing too. Just make sure you shake well before using.


The making? Easy.

Preparation Time: 10 min
Cooking Time: 15 min
Serving for: 4 pax

Ingredients:


Peanut Sauce Pasta:
1/2 packets of spaghetti 
12 stalks of baby spinach, wash and cut into chunks about 5cm long
1 medium potatoes, roughly sliced
2 clove of garlic, sliced
3 eggs, beaten and add a teaspoon of soy sauce & pepper
1 table spoon soy sauce
1/2 table spoon of dark soy sauce (optional)
A dash of rosemary (dried or fresh)
A dash of salt
4 tablespoon of Roasted Peanut sauce

A) Chicken Fillet & Marinate:
200gm chicken breast, cut into short strips
1 teaspoon of salt
A few drops of sesame oil 
A dash of pepper 

Fancy some crunchy fillet instead?

B) Crunchy Chicken Fillet & Marinate:
200gm chicken breast, cut into short strips
1 tablespoon of teriyaki sauce (can replace with soy sauce)
1 teaspoon of salt
A few drops of sesame oil 
A dash of paprika powder (optional)
A dash of pepper 
2 tablespoon corn starch
3-4 tablespoon of breadcrumbs


The Making:
1. Season the chicken strips, set aside (for method A).

2. Heat up 2 tablespoon of olive oil in a wok, sauté the garlic till fragrance then add in the potato strips, follow by the chicken strips. Stir fry for about 2 minutes.

3. Add boiled water (room temperature) into the wok to just enough to cover the pasta, let to boil then toss in the spaghetti. Add the salt, soy sauce and rosemary then let it simmers for 8-10 minutes with the lid closed.

4. While the spaghetti is cooking, heat up a table spoon of olive oil, pan fry the egg liquid to make a large Omelette. Using the spatula, roughly cut the omelette and set aside. 

5. On the final 2 minutes, toss in the  b
aby spinach and close the lid to let it cook for 2 minutes.
 Turn off heat, toss in the Omelete and roasted peanut sauce into the spaghetti, mix well. 

That's it,  your Japanese sauce spaghetti is ready to serve! 

And if you feel like adding some crunchy chicken fillets, here's how...

7. Marinate the chicken fillets, coat them with a thin layer of corn starch and generous amount of bread crumbs. 

8. Heat up 3 tablespoon of cooking oil in a non stick pan, fry both sides of the fillets for about 3 minutes or until it turns golden brown. (You may cook few fillets at same time if you have a large enough pan, just don't turn the fillet too soon)

9. Dish out and let the oil drops off before serving.

Itadakimasu!


Do note that this dish is best to serve warm as the sauce may dry up quite fast.  However the pasta taste nice as it absorbs all the sauce. 

Important..
For children below 2yo or anyone with known allergic history to nuts, do avoid the peanut sauce altogether. 

Sunday, October 12, 2014

Easy Homemade Meatball Spaghetti


My little ones are both meat lovers, although they like veggies in general but meat dishes are always better received. Onion is a big no-no for them, both will diligently picked up any onion sliced in their dish. So I thought to add some diced onions into the meatballs without them noticing.

My trick worked, my little E loved the meatball spaghetti so much that he kept telling the daddy "I like this, it's delicious!" and he actually finished everything on his plate, including 7 meatballs that he made. He had been a great little helper in the kitchen since he turned 5yo and his involvement in the process had helped him to appreciate the food a lot better. 

I cooked up this dish without any reference, as I wanted to cook a stewed version instead of the conventional tomato sauce meatballs. These meatballs are crunchy on the outside but soft on the inside, even big guy approved of them. :)
  
Here's the meatball loaded serving for him. 


Mini meatballs for my little ones.


For mine, is quite a big portion too. I must confess that I'm quite a big eater. :p
(Everyone has equal portion of the green Romanies)

My little helper busy rolling meatballs and coating them with flour. Wearing the pajamas and apron made by mommy :)


So, are you ready to make some? Here's the recipe. It may look complicated due to the many herbs and spices used, but the making is really pretty simple.


Preparation Time: 20 minutes
Cooking Time: 15 minutes
Serving for: 20-30 medium meatballs  
What you need:

The Ingredients:

For Meatballs
• 300gm of minced beef (lean meat)
• 1 small carrot, diced 
• 1/4 yellow onion, diced
• 2 clove garlic, diced 
• 2 tablespoon cheddar cheese, cut cubes
• 2 tablespoon bread crumbs 
• a dash of salt
• a dash of pepper
• a dash of rosemary
• a dash of black pepper or paprika powder
• 1 tablespoon light soy sauce
• 4 tablespoon all purpose flour

For Sauce
• 1 tablespoon light soy sauce
• 1 teaspoon dark soy sauce
• 1 tablespoon Worcestershire sauce
• 1 teaspoon brown sugar
• 2 tablespoon white wine (optional for little ones)
• 1 cub water or stock

The Making:


1. Place all the ingredients for meatball (except the flour) in a big bowl and mix well using a pair of chopsticks or a fork.

2. Roll the beef mixture into balls of your preferred size - we had some mini ones for the kids and medium size for the adults. 

3. Pour the flour in a clean plate, coat a layer of flour over the meatballs by rolling it over the flour. 

4. Heat up 3 table spoons or olive oil in a skillet, cook the meat ball for about 2 minutes on each side or until they turn brown. Set aside.


5. To prepare the sauce, just mix all the sauce ingredients together in a pan (sugar shall be the last), bring it to boil and toss in the cooked meatballs. Let them simmer on low heat for about 10 minutes or until the sauce thickened. 

Tips: When cooking for little ones, you may scope out the sauce and meatball before adding the wine.

6. While the saucing is cooking, prepare the spaghetti according to the instruction on the box. Should take only about 10 minutes. (I used the leftover stir fried spaghetti)
7. Pour the sauce over the spaghetti that you have prepared and serve immediately.

Bon appetite!


Saturday, July 26, 2014

{Travel Special}Tortellini In White Sauce


This blog has been quiet recently as I have been away for our family trip. It's the time of the year to be away from work, chores and just be on adventure with our little ones.

While we opt to enjoy local food and drink most of the time, places like Switzerland is just way too costly to dine out (imagine paying RM60 for one simple Burger King set), and sometimes after a long day out the little ones were just too exhausted to walk anymore (it's a DIY trip). These are the moments that call for simple home-cook. 

I got all the ingredients from the local marché (market) and cooked this simple pasta in white sauce with ham. Only took me 20 minutes and it was a really satisfying meal for everyone.


Preparation Time: 5 min
Cooking Time: 15 min
Serving for: 3-4 pax

Ingredients:


All fresh from the market:

• 300gm Tortellini pasta
• 1 cup of fresh milk 
• 1 packet of butter (above 1 spoonful)
• 100gm of ham, finely sliced
• 2 big spoon of cheddar cheese, roughly cut into cubes
• 1 egg (I did not buy any, so skipped)
• 8 brown mushrooms, briefly washed and sliced
• 6 sweet peas, washed and cut (in replacement for lack of basil leaves)
• salt & pepper to taste


The Making:
1. Melt the butter in a hot pan, toss in the mushrooms, stir fry for a minute then add in the sweet peas and ham. 

2. Let cook for about a minute, then add the milk, egg and cheese cubes. 

3. Let it boil for a minute or more until the cheese melted, add the Tortellini pasta, basil leaves and salt & pepper to taste. 

4. Close the lid and let the pasta simmer in the sauce for 10 minutes. If it gets too dry, add a little more milk.

5.Garnish with some basil leaves and serve hot. 

Bon appetite! 


Just some Tips for Cooking while Travelling: 

• opt for apartment / motel where kitchenette are provided so simple cooking is possible. In absence of kitchenette, can make sandwiches instead.

• Keep few packet of butters from the airplane meal or hotel buffet, it is great replacement for cooking oil (no point buying a bottle of cooking oil just to cook one meal! ;)

Saturday, July 12, 2014

Spaghetti with Baby Spinach


My duo love spaghetti, noodles, vermicelli... Anything that is stringy and chewy. So again I'm cooking spaghetti for lunch today and I loaded it with baby spinach, the one leafy veggie that is perfect for little ones, and top it with some Teriyaki chicken strips. Simple and delicious lunch, ready in no time.


My little ones had 2 plateful each and their plates were all cleaned. They don't usually like leafy veggie due to the fiber, but this baby spinach was well accepted as it is easy to chew and blends well with the pasta.

So, if you have picky little one who does not like their greens, do give this a try. ;)


Preparation Time: 8 min
Cooking Time: 15 min
Serving for: 3-4 pax

Ingredients:
1/2 packets of spaghetti 
200gm chicken breast, cut into short strips
12 stalks of baby spinach, cut into chunks about 5cm long
1/2 medium carrot, thinly sliced
 2 clove of garlic, sliced
3 eggs, beaten and add a teaspoon of soy sauce & pepper
1 table spoon soy sauce
1 teaspoon of of salt

Chicken Marinate:
1 tablespoon of teriyaki sauce
1 teaspoon of salt
A few drops of sesame oil 
A dash of pepper

The Making:
1. Boil a pot of water, cook the spaghetti according to the time suggested on the packaging (about 12 minutes). Blanch and set aside, add few drops of olive oil to avoid the spaghetti from sticking together.

2. While the spaghetti is cooking, season the chicken breast. Heat a table spoon of olive oil, pan fry the egg liquid to make a large Omelette. Using the spatula, roughly cut the omelette and set aside. 

3. Heat up a tablespoon of olive oil, toss the chicken strips into the pan and pan fry each side for about 2 minutes until the meat is cooked. Set aside.

4. In the same pan, heat up 2 table spoons of olive oil, toss in the garlic and saute till golden brown. Add the carrot slices, stir fry for about 2 minutes then add the spaghetti and spinach. 

5. Add about a cup of water, a teaspoon of salt and a tablespoon of soy sauce into the pan, stir to mix well then close the lid and let it simmers for approximate 5 minutes. 

6. Toss the Omelete into the spaghetti and mix well. Let it cook for another 1-2 minutes, then turn off the heat and your spaghetti is ready to serve. Just don't forget to top the teriyaki chicken strips on top before serving. ;)


Sunday, May 25, 2014

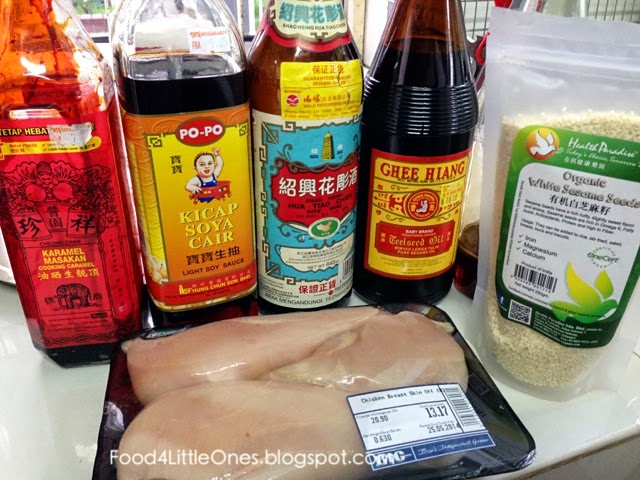
Honey Sesame Chicken Cutlets 蜜糖芝麻鸡块


Bi-lingual | 双语版


We are having a small family potluck party tonight and I wanted to cook something that is suitable for all ages. My old ma likes food that are crunchy and so does my duo. I was out of idea so I decided to just do a round visit in the supermarket to find my inspiration, and I found. When I saw the  fresh chicken meat on the shelves, I thought to myself it's time to cook some traditional Chinese dish that is our family's favorite whenever we visit the restaurants - Sesame Chicken Cutlets, in honey sauce.


Served with some baby pak choy, it was quickly finished up in the dinner.

Give it a try, your little ones will probably thank you for it. ;)
 
Preparation Time: 5 min
Cooking Time: 15 min
Serving for: approximate 6 person

Ingredients:

600gm/ 3 strips of chicken breast, cut into cubes 600克/三大片鸡胸肉,切块

For Marinate / 调味料
3 tablespoon soy sauce 三汤匙酱油
teaspoon sesame oil 一茶匙芝麻油
1 tablespoon corn flour 一汤匙粟粉
1 teaspoon of Shao Xin wine 一茶匙花雕绍兴酒
A dash of salt 盐适量
A dash of pepper 胡椒粉适量

For coating / 煎料:
1 egg, beaten 蛋一粒,打散
5 tablespoons corn flour 粟粉,五

For sauce / 酱汁
1 tablespoon of organic sesame seeds 一大匙白芝麻
2 tablespoons raw honey (adjust accordingly) 两大匙野生蜜糖 (自己加调)
1 tablespoon soy sauce 一匙酱油
1 tablespoon dark soy sauce 一匙黑酱油
1 teaspoon brown sugar 一茶匙黄糖
5 tablespoon water 五汤匙清水


The Making / 做法:

1. Marinate the chicken cutlets with the marinating ingredients (except sesame seeds) for 10 minutes or more. 
把鸡肉切块,以酱料(除了白芝麻)十分钟左右。

2. On a heated wok, cook the sesame for a minute without oil, set aside. 
一个烧锅炒香白芝麻,免油。


3. Heat up about 5 tablespoon of cooking oil, coat the chicken cutlets with egg liquid follow by corn flour, deep fry for about 3-5 minutes or until golden brown. 
烧热一锅油 (约五大匙的油)把鸡肉块裹上蛋液和粟粉,放入热油中大火炸约三、五分钟至金黄色。


4. Set the fried cutlet aside, use a kitchen towel to absorb the excess oil if too oily. Discard the excess cooking oil.
把鸡肉块捞起备用,用吸油纸吸掉多余的油。把锅里的余剩的油倒掉。

5. Mix the ingredient for the sauce in a bowl, then heat up on the wok. When the sauce is starting to boil, add the chicken cutlet and stir fry for about a minute. 
用小碗把酱料调均,倒入热锅中烧滚,加入鸡肉块,快炒1分钟左右至酱汁完全被吸收,即可熄火。

6. Dish out the cutlets to serve on a plate of blanch baby bak Choy, sprinkles the sesame seeds right before serving.
把鸡肉块盛在碟上(我用烫熟的小白菜铺在盘底),撒上炒熟的白芝麻,即可上桌。


趁热吃哦!香喷喷的蜜糖芝麻鸡块和着热腾腾的白米饭入肚,人生一大乐也。我的小瓜们各吃了好多块呢!


You are all set! Enjoy the dish as is with a bowl of steaming white rice, the sweet and aromatic sauce will sure stir up your appetite.. My duo actually ate many pieces of the chicken cutlets nonstop :)